SB SBT SB2 S2T SB3 S3T SB4 S4T SB5 S5T
| Infantry tank | |
|---|---|
 A Churchill (A22 Infantry Tank Mk IV) of the North Irish Horse during the advance towards Florence, 23 July 1944. | |
| Type | Armoured fighting vehicle |
| Place of origin | Britain |
| Service history | |
| In service | 1938–1945 |
| Used by | British Army Indian Army Commonwealth forces |
| Wars | Second World War |
The Infantry tank derived from a concept developed by the British and other armies in the 1930s. Financial and technical constraints and the need to rely on commercially produced engines had left medium tank prototypes underpowered. The cuts imposed by the government in 1931 during the Great Depression fell most heavily on the army and the design of medium tanks capable of all roles was abandoned in the early 30s. The Kirke Committee reported in 1931 that cheap and unsophisticated vehicles could meet the need to support infantry.
Infantry tanks would be thickly armoured to survive frontal attacks on prepared defensive positions. A counterpart of the Infantry tank would be the Cruiser tank, a lighter-armoured and faster vehicle. Once a breakthrough had been achieved by infantry supported by Infantry tanks, artillery and aircraft, Cruiser tanks and light tanks could use their speed and range for flank attacks, cutting the lines of supply and communication of the opponent, then pursuing the defeated force.
First class vehicles for each role could be designed; the extra armour on Infantry tanks made them slow but was more important for infantry support. Constraints on tank design diminished as rearmament matured in the early 1940s, particularly in engine power and suspension. Infantry and Cruiser tank designs converged, as did the tactics of Infantry and Cruiser tank units, leading to the fast, well-armoured Tank, Cruiser, Mk VIII, Cromwell (A27M) and the Tank, Cruiser, Comet I (A34) "heavy cruisers" of 1944–1945 and the Centurion tank (A41) the first modern Main battle tank.
Infantry tank chassis were used to provide specialist mine-clearing, bomb-throwing, flame-throwing, bridge-laying, amphibious, searchlight-carrying and infantry-carriers. Troops could keep up with tanks in vehicles with equivalent armour protection, ready to disembark and overcome German positions from close range.
Background edit
Eastland vs. Westland, 1927 edit

In 1927, the EMF (Eastland) fought the 3rd Infantry Division (Major-General John Burnett-Stuart) and a cavalry brigade (Westland), both sides having air support. The opponents began the exercise 35 mi (56 km) apart, Westland to capture high ground near Andover against Eastland based at Micheldever. The Fast Group dodged Westland cavalry patrols, covered 40 mi (64 km) and captured bridges, which enabled the rest of East land to advance.[a]Despite a few losses from air attack, the Fast Group armoured cars attacked the vanguard of the Westland column and pinned it down aircraft at low altitude and a flank attack by the tanks. Eastland then leaguered overnight but Westland kept moving.[2]
Eastland armoured car and tankette reconnaissance parties spotted the move but lacking wireless, sent a despatch rider whose motorcycle broke down, half of the West land was over the River Avon before Collins received the information. Part of Westland reached the objective on the next day, winning the contest, albeit surrounded and under counter-attack by Eastland. After the exercise, Collins discussed the difficulties encountered by the EMF and its vulnerability to anti-tank guns and artillery. Burnett-Stuart said that the tank should no longer be considered an infantry-support weapon but the main arm on the battlefield. The General Staff produced a training memorandum in early 1928, which criticised poor coordination in the EMF and its failure to organise self-sufficient fire support before attacks.[2]
Armoured Force, 1928–1933 edit
The EMF was renamed Armoured Force (AF) and in early 1928 the 280 vehicles of 15 types conducted exercises to test the limits of the AF. At the end of the year the AF was suspended because the army took the view that little more could be learned from it as presently constituted. Milne wanted a year's interval due to the lack of light tanks and tankettes necessary for an experimental brigade with a battalion of light tanks and tankettes with three battalions of infantry. In the period 1930 to 1931, Milne intended permanently to establish a 1st Armoured Brigade. An experimental Tank Brigade was established with three battalions of mixed medium and light tanks and a battalion of Carden-Lloyd machine-gun carriers operating as light tanks for reconnaissance but with no supporting arms. Broad commanded the brigade and concentrated on improving command by using flag signals and radio sets fitted to company and command vehicles. After two weeks the Army Council witnessed a manoeuvre in formation, which was maintained through a bank of fog, a persuasive example of massed armoured manoeuvre. The British were the world leaders in tank design and the organisation and use of armoured forces. The Reichswehr in Germany had only a few covert prototype vehicles and had created little in writing about the use of tanks. In the US, tank experiments had only begun and in the USSR, the Red Army had started to develop theories of deep operations but the best Soviet tanks were Vickers derivatives.[3] In late 1933, the new CIGS, Field Marshal Archibald Montgomery-Massingberd permanently established a Tank Brigade under the command of Percy Hobart. In February 1934 Massingberd desired to include a tank brigade and a cavalry division with mechanised transport and light vehicles for reconnaissance, in a Field Force for continental operations but in October decided that the cavalry division should be replaced by a mechanised Mobile Division.[4]
Modern Formations, 1931 edit
Lieutenant-Colonel Charles Broad, Deputy Director of Staff Duties wrote the provisional manual, Mechanized and Armoured Formations in 1929 and a revised version, Modern Formations in 1931. The manuals anticipated the division of the army into two, Mobile Troops of cavalry brigades and cavalry divisions, light armoured brigades and armoured divisions and Combat Troops, with medium armoured brigades and infantry divisions. A light armoured brigade would contain a headquarters and signal section, two to three light tank battalions, a close support tank battery and an armoured anti-aircraft battery. Medium armoured brigades would comprise a headquarters and signal section, a medium tank battalion, two light tank battalions, two close support tank batteries and an armoured anti-aircraft battery. Light armoured divisions were mentioned but not a role or equipment. Neither medium or light armoured brigades had infantry or machine-gunners and the role of field artillery was taken by close support tanks carrying howitzers for high explosive fire, rather than the conventional medium tank armament of a small-calibre high velocity gun to fire solid shot ammunition. In the manuals, the all arms mechanised force gave place to a concept of tank-only brigades containing several types of tank. The purpose of light armoured brigades was that of cavalry, reconnaissance, screening, flank protection and flank attacks. The medium brigades were to conduct raids and co-operate with infantry divisions. [5]
The later volume referred to a Mobile Division of perhaps a motorised infantry brigade, two tank brigades and divisional troops, similar to a 1914-pattern cavalry division, acting as a covering force for the infantry and to make attacks on the flanks an rear of an opponent; frontal attacks were not mentioned. There was no comment in either manual on units larger than a brigade and no suggestion that large mechanised forces might conduct a frontal attack and then a deep and decisive penetration. The creation of operational and strategic armoured reserves was also absent as was the prospect of battle between armoured formations. Broad expected armies to become smaller and that air power had made a nation in arms impractical.[6] Broad envisaged an alternative to the abortive Medium Tank Mk III which would be cheaper, smaller, faster, with thinner armour and carry an anti-tank gun and machine-guns. Large numbers of the tanks were to be used in "cruiser tank warfare". Since such a vehicle would be too vulnerable for infantry support operations, a new class of heavily armoured tanks known as Infantry tanks would be produced. Tanks for the infantry did not need speed and would have to be small for easy camouflage, concealment being relatively easy in the close country where infantry operations were expected to take place.[7] The new cruiser tank type would mostly operate on open ground where speed and good cross-country capability were important. Much of the remainder of the document was devoted to decisive cruiser tactics, in an environment of small, expensive armies, which would have difficulty in covering their flanks.[8]
Battle of Beresford Bridge, 1934 edit
On 25 January 1934, Massingberd issued a directive to determine the training of the Tank Brigade which, rather than frontal attacks, emphasised independent operations such as raids and flank attacks. The brigade was to prepare for strategic or quasi-independent attacks on an enemy's organisation behind the front line by exploiting an opponent's weakness rather than confronting strengths. The brigade was to examine its ability to manoeuvre en masse, co-operate with the RAF and experiment with the means to supply and maintain the force while moving 70 mi (110 km) a day or 150 mi (240 km) over three days and then conducting an attack. The Tank Brigade was composed of the 2nd, 3rd and 5th battalions RTC, each with Vickers medium tanks and tankettes. In May a staff exercise was conducted to devise methods for deep operations behind an enemy front line, in which the enemy had invaded friendly territory and a counter-offensive was about to begin. The brigade would make a 100 mi (160 km) flank move to attack enemy rear organisations 40 mi (64 km) behind the front line. The result was a decision to move dispersed on a wide front to deceive the enemy as to the objective and to evade air attack. The RAF was to co-operate for reconnaissance, air defence, supply and as a substitute for artillery support, which was thought incapable of keeping up.[9]
When the brigade began to train as a unit, the Tank Brigade had four battalions, three with a combination of medium tanks and tankettes and a light tank battalion with three companies of light tanks and tankettes. Each medium company had an HQ section of four medium tanks and three mixed companies with a command tank, a section of seven tankettes or light tanks, one section of five medium tanks and a section of two tanks for close support, theoretically carrying guns capable of firing high explosive shells; no tanks were armed like this and Vickers medium tanks were substituted instead. Nearly all the force was tracked and there were no infantry or artillery. Hobart manoeuvred the brigade in a 10 mi × 10 mi (16 km × 16 km) box formation which could make 8 mph (13 km/h) covering about 60 mi (97 km) a day and move somewhat more slowly at night. The brigade was so successful that the non-mechanised troops of Aldershot Command complained that they were being set up to fail. In September the Tank Brigade was joined by the 7th Infantry Brigade, a brigade of motorised field artillery and supporting units to make up the Mobile Force and opposed by a non-mechanised infantry division, a brigade of horsed cavalry and two armoured car units.[10]
In the autumn of 1934, Burnett-Stuart, now GOC Aldershot Command, adjudicated that the Mobile Force to have neglected supply difficulties and devised an exercise to challenge the force. Several objectives behind enemy lines near Amesbury were to be raided and the Mobile Force was to be ready to fight a battle after the raids. The challenge required a long approach march from its assembly area and cross the defended obstacle of the Kennet and Avon Canal. The exercise was to begin at 2:00 a.m. on 19 September against the 1st Infantry Division (Major-General John Kennedy), which left only four hours of darkness, insufficient for the move to be completed before daybreak. Lindsay had no command staff and several members of the Tank Brigade and infantry brigade staffs were at odds. The Mobile Force plan was a wide flank move at night around rather than through the opponent and then a daytime lay up for maintenance followed by the raids on day three. Burnett-Stuart had doubts because of the supply implications of the scheme and a new plan for the 7th Infantry Brigade to capture canal crossings on day one was adopted, for the Tank Brigade to cross at night, the raid plans to be decided later.[11][b]
The Mobile Force began from Gloucester, west of the River Severn, to break through the defenders' positions at Hungerford. The infantry brigade made a 50 mi (80 km) night move across the front of the defenders and easily captured crossings at Hungerford but was then subjected to bombing while waiting for the Tank Brigade to move during the night. When the brigade arrived, the element of surprise had worn off and the Mobile Force faced powerful opposition. During the afternoon of 20 September, umpires judged that the Mobile Force was compelled to retire by air attack; Kennedy sent armoured cars and cavalry sortied to the north, planted mines and blocked roads, which made the retreat of the Mobile Force most difficult. Despite the partiality of the umpires, the Mobile Force split up and managed to retreat, bypassing many of the obstacles. The exercise was condemned by Liddell Hart who portrayed its rules as biased and which had a disastrous effect on the development of armoured forces but it had no effect on the attitude of the General Staff.[13] Exercises in England had either been unrealistic operations on Salisbury Plain or road-bound, with no obstructions from demolitions or anti-tank obstacles like minefields, broken bridges, rivers, defiles and ridges. With no need of engineers to overcome obstacles, there was no need to gain control of an area with infantry. In 1935, much of the equipment used by the Experimental Mobile Force was sent to Egypt.[14]
Prelude edit
FSR (1935) edit
The 1935 edition of the War Office publication, Field Service Regulations (FSR), written by Major-General Archibald Wavell, contained the principles by which the army was to act to achieve objectives. Breakthrough was made the responsibility of infantry divisions with the support of Army Tank Battalions, equipped with Infantry tanks, specialised vehicles for infantry–artillery co-operation. Once a breakthrough had been created, a Mobile Division containing a tank brigade with light and cruiser tanks, would advance through the gap and use the speed and range of its tanks to surprise the defender and attack flanks, headquarters and non-combatant units. Defence against tanks could be achieved by troops finding physical obstacles like woods, rivers or minefields as long as they were covered by fire from other weapons and by controlling their own anti-tank guns. In places lacking convenient terrain features, lines-of-communication troops would also need anti-tank guns and be trained to set up localities suitable for all-round defence.[15]
In FSR, tanks were expected to attack the flanks and rear of an enemy force while co-operating with infantry but not be in close contact. In a second scenario, tanks provided direct support while moving fast to avoid presenting easy targets to anti-tank guns. The tanks would have a start-line behind the infantry and the advance would be synchronised with the infantry so that both arrived at the objective simultaneously. When tanks were the main attacking force, FSR allowed the tanks to used the same line of approach as the infantry or attack from a flank, depending on the presence of barbed wire, the nature of the ground, its suitability for fire and manoeuvre and the the possibility of obtaining surprise. The start lines of the infantry and tanks and the jumping-off times and speeds of advance must be settled beforehand, the tanks should assemble under any cover available and keep going forward once the advance had begun. The effect of the arrival of the tanks in an enemy position could be magnified by the prompt arrival of the infantry to exploit confusion among the defenders, quickly to capture ground. On occasions the infantry would begin first to reach suitable assault positions close to the objective but using this method, sufficient covering fire was essential.[16]
MTP 22, 1939 edit
| Year | Light | A9– A13 |
Total |
|---|---|---|---|
| 1938 4th qtr |
169 | 29 | 198 |
| 1939 | 734 | 235 | 969 |
| to June 1940 |
140 | 418 | 558 |
| Total | 1,043 | 682 | 1,725 |
The Military Training Pamphlet (MTP) contained most of the theory by which the army operated, the series covering most of the trades and specialisms of the army. Pre-war manuals were produced by committees and published by the Army Council but this was a slow, bureaucratic process. In late 1939 writing was transferred to officers chosen by the Directorate of Military Training, under the CIGS but this was still too slow; a manual for the infantry division in defence took 15 months to write. Quickly to circulate new tactics and revised thinking derived from experience, Army Training Memoranda (ATM) were produced by the War Office with short pieces on tactics, administration and training.[18][c] The Army Training Instruction (ATI) was a War Office publication for new or revised thinking without the delays of editorial review required for MTPs. ATIs were provisional, pending a MTP, except for ATI 2 The Employment of Army Tanks in Co-operation with Infantry, which was an addition to MTP 22.[19]
In September 1939, the tactics laid down in FSR (1935) had been altered by MTP 22 Tactical Handling of Army Tank Battalions to take account of the anticipated invulnerability of heavily armoured tanks and that German defences were expected to be 1,000 yd (914 m) deep. Artillery-fire was the foundation of the attack, with a bombardment and barrage preceding the tank advance along with fire called for by forward observation officers moving with the tanks. A proportion of the Infantry tanks were to form a first wave and rush the defenders before they recovered from the bombardment; some tanks further back were to advance at the same pace as the infantry and suppress any remaining small-arms fire, the infantry keeping close behind the tanks to deal with surviving anti-tank guns. The second wave of tanks, behind the infantry, could advance on the same line or move to a flank to engage German infantry. The advance of the first tank echelon independent of the infantry was questioned by some trainers, who thought it unwise for tanks to advance too far in front of the infantry, except against a weakened defence. Against a prepared position, Major Harold Pyman at the Indian Army Staff College (Quetta) recommended a mixed tank–infantry wave a maximum of 100 yd (91 m) deep behind a creeping barrage, the opposite of the War Office view.[20] Counter-attack tactics on an enemy armoured breakthrough were also added.[21]
Tanks A9 and A10 edit

The experimental armoured formations of the British army were mostly equipped with the Vickers Medium Tank Mk I and Medium Mk II; most of the vehicles were at the end of their mechanical life and were judged obsolete by the 1930s. It was impractical to build more because their road speed of only 18 mph (29 km/h) was too slow for manoeuvre warfare and their armament of a 3-pounder gun lacked the power to penetrate newer foreign tanks.[22] By 1931, experience with the Experimental Mechanized Force led to the report of the Kirke Committee and specifications for three types of tank, a medium tank with a small-calibre anti-tank gun and a machine-gun, a light tank armed with machine-guns for reconnaissance and to co-operate with medium tanks by engaging anti-tank guns. A close support tank armed with a gun firing high explosive and smoke shells to give covering fire for tank attacks was also specified.[23] The Wall Street Crash of 1929 and the Great Depression led to big cuts in government spending and money spent on tracked vehicles by the Army fell from £357,000 1931–32 to £301,000 1932–33; spending did not exceed the 1931 figure until 1934–35.[24]

The A 6 (Vickers Sixteen Tonner) of 1928, at £16,000 per vehicle, fell victim to the cuts and only three prototypes of the derivative Medium Tank Mk III were built. The Royal Ordnance Factory Medium Tank A 7 design was another failure; only three prototypes were built.[25] The expense of tank research led the Director of Mechanisation to cancel work on a replacement medium tank in 1932. In 1934, the Army Council decided that each infantry division should have a battalion of Infantry tanks and when development work resumed in 1935 the army had a light tank. There was no design bureau for a new medium tank and no engine powerful enough to move one. To avoid delay, production of a new medium tank was abandoned in favour of specialist tanks for close infantry support and for independent operational manoeuvres.[23][d] A 1938 private venture, the Vickers 6-Ton tank, was also rejected as inadequate but designs with commercial engines led to the A9 Cruiser Mk I, intended to be a cheaper "Woolworth" Medium Tank Mk IV and A10 Cruiser Mk II which was supposed to be the first Infantry tank, both armed with the new 2-pounder anti-tank gun as a specialised Cruiser tank and Heavy Cruiser respectively, rather than a standard medium tank with a dual-purpose gun.[26][e]
1938–1942 edit
In 1938 a decision was made by the British government to crate an armoured force for operations in France and the General Staff responded by stressing the need for new tanks to be thickly armoured. Matilda and Valentine tanks were capable of resisting hits by the artillery and anti-tank guns possessed by the German army in 1939. As news arrived that the Germans were working on the more powerful 50 mm Pak 38 War Office specifications for armour protection were increased accordingly and the A 22 Infantry tank Mk IV, which became the Churchill tank, the 76 mm (3 in) armour requirement was augmented to 89 mm (3.5 in) as a precaution. Existing Cruisers carried less armour but the Cromwell design of late 1941 had as much armour as the Infantry tanks of 1940.[27][f] The speed of early-war British tanks was less satisfactory and most tanks had a poor power to weight ratio, partly because of the weight of armour protection. The Matilda I was the slowest but the Matilda II had a top speed of 15 mph (24 km/h) and the Valentine 13 mph (21 km/h) which proved unsatisfactory in combat. Until 1940, British designers were limited to commercial 150 hp (110 kW) engines except for the Churchill, powered by a modified Bedford 350 hp (260 kW) engine, which remained inadequate as more armour was added to later marks. The US Liberty and the Rolls-Royce Meteor engines were the most powerful types but the Great War vintage Liberty, in use from 1938, was unreliable and the Meteor was not available until 1942.[29]
Some of the failings of British tanks could be blamed on the hiatus in development during the early 30s and the limited design capacity of Vickers and at Woolwich but during peacetime rearmament other companies were employed and the Cruisers Mk I to Mk VI and Infantry tanks Mk I to Mk III came into use. When the Ministry of Supply took over tank production, no advanced designs or prototypes existed; the effect of earlier neglect was worst from 1940 to 1941 but tank development suffered for the rest of the war. Advances in transmission and suspension design came piecemeal from talented engineers rather than the considered exploitation of development experience. Producing tanks "off the drawing board" led to frequent production delays and tanks being delivered before teething troubles had been resolved, making them unreliable. In the crisis of 1940, Churchill ruled that quantity was the priority and that fairly good tanks were better than none at all and the emphasis on quantity continued into 1941. The Infantry tank Mk IV Churchill was rushed into production and the first 14 were delivered by 30 June 1940. Better versions were available in 1942 yet it was not a satisfactory design until 1943. Delaying the introduction of the the 6-pounder gun led to a crisis in 1941 when the 2-pounder was outclassed by the new German 50 mm tank and anti-tank gun. Pre-war limits of height, width and weight imposed on designers continued until 1943, when US imports had demonstrated that the War Office specifications were less important than had been supposed.[30]
The War Office chopped and changed specifications and the General Staff also vacillated over the tactical requirements for tanks as experience from the front was assimilated. After the decision in the 30s to produce Infantry and Cruiser tanks rather than continue the attempt to design a medium tank, the balance between Infantry and Cruiser tank production varied. Until Dunkirk, the army wanted Infantry tanks and increased the proportion from 36 percent of production to 51 percent. After Dunkirk, the proportion of Cruiser tanks was set at 45 percent then increased to 78 percent and Infantry tanks reduced to 22 percent. In 1941 the General Staff increased the proportion of Infantry tanks to 30 percent and operational requirements for both types converged to the point that Infantry tank and Cruiser tank specifications became so similar that it possible for one design to meet both. The Cromwell tank design of 1941 combined the speed of Cruiser tanks with the armour protection of Infantry tanks but took until 1943 to go into service. The Cromwell proved the best British tank designed during the war, although the influence of Desert War fighting in its design, made it less effective in the Bocage during the Battle of Normandy.[31]
Anglo-US tank policy, 1942–1945 edit
Before the US entry into the war in December 1941, the British relationship with US suppliers was that of the customer. The British Special Tank Mission (Director, Michael Dewar), organised by the Ministry of Supply in June 1940, exerted influence over tank design but the US government refused to build existing British designs. The mission persuaded the United States Army Ordnance Department to alter the design of the Medium Tank, M3 (Lee), the US design closest to production, which became the Grant in British service. Co-ordination improved once the US was at war and it became clear that the British would become a bigger customer of US producers. The design of the Medium Tank, M4 (Sherman) was influenced by British experience, being described as the "perfect conscript's weapon" for its ease of maintenance and dual-purpose turret-mounted gun. By the time that the American Tank Mission arrived in Britain during the late summer of 1942, the British had decided to return to common-purpose designs. At the end of the year, the British General Staff defined the requirements of tank development and in September a joint statement was agreed that a basic design was needed with standard transmissions, suspensions and engines.[32] In the standard chassis, variations of gun, speed, armour and range were to be produced to create
- Medium Cruiser tanks as standard
- Self-propelled Mountings with gun or howitzer (up to medium); dual-purpose AA/AT gun (up to heavy)
- Specialist tanks
- Armoured Command Vehicles
- Heavy Tanks achieved by cutting gun power, crew complement, radius of action and speed for armour[33]
Late revisions to tank policy by the War Office occurred but were for particular items, like the rush to mount 17-pounder guns on tanks; no general statement of design superseded the decision made by the British and US staffs on a general purpose tank capable of considerable modification for new weapons and tasks.[32]
Infantry tanks edit
A11 Infantry Tank Mk I (Matilda I) edit
.jpg)
For the General Staff specification for an Infantry tank, Vickers produced a two-man tank design with a machine-gun, powered by a civilian Ford V8 engine of 70 hp (52 kW) in 1935. The A11 Infantry Tank Mk I (Matilda I) was the first practical expression of the decision to split design into Infantry tanks and Cruiser tanks, with different functions and tactics, in separate units and formations.[23][34] The prototype of October 1936 weighed 10 long tons (10 t), was 16 ft (4.9 m) long and 6 ft (1.8 m) high. The tank had a maximum speed of only 8 mph (13 km/h) and was too small to carry a radio but had 60–65 mm (2.4–2.6 in) of armour. While the prototype was being tested, more firepower and a three-man turret was considered to be necessary and the Matilda I was built only as a stopgap. The tank was notable for its low price but of the 139 built, only 67 had had been delivered when the war began; the tank was found to be mechanically unreliable, which was exacerbated by a lack of spare parts.[35]
A12 Infantry Tank Mk II (Matilda II) edit

The A.12 Infantry Tank Mk II (Matilda II) was a development of the medium tank A 7 design with more armour. The tank was ordered "off the drawing board" to save time and was accompanied by a close support version Matilda II CS with a 3-inch howitzer.[36] The General Staff specification for the A12 E1 was for armament of one 2-pounder and a .303-inch machine gun; the tank carried the 2-pounder and a 7.92 mm Besa mahine-gun. Armour was to be of 70 mm thickness and the tank had 70 mm on the sides and 78 mm on the front, the specification for a top speed of 15 mph (24 km/h) was met, the maximum weight of 20 long tons (20 t) was exceeded at 26.5 long tons (26.9 t) and the range specification of 50 mi (80 km) was comfortably surpassed at 160 mi (260 km).[37] The A12 was still slow but its cast armour made it almost invulnerable to tank guns and standard foreign anti-tank equipments like the German 37 mm Pak 36. The vehicle was 18.5 feet (5.6 m)* long and 8 ft (2.4 m) high, with a four-man crew and a three-man turret, which was big enough for a radio and a 2-pounder high-velocity gun, firing solid projectiles capable of penetrating all German tanks built from 1939 to 1940. Vickers and government factories could not take on the work and it was farmed out to a civilian firm which lacked experience, designers and draughtsmen. It took until 1939 to bring the A12 Matilda II into production and it had not gone into service when the war began and the small turret ring of the Matilda made it impossible to replace the 2-pounder with a bigger gun. Production of the tank ended in 1943, by when 3,000 had been built, some for export to the USSR.[36]
Infantry Tank Mk III (Valentine) edit
The Infantry tank Mk III Valentine tank was a private venture by Vickers and had no A number. The tank was similar to the Tank, Cruiser, Mk I (A9) with armour of up to 65 mm (2.6 in) thickness but a maximum speed of 15 mph (24 km/h), only half that of the cruiser. The War Office rejected the design but reinstated it when the output of any tank became more important than quality after Dunkirk. The early versions had a petrol engine but later vehicles were powered by a diesel and gained a reputation for reliability. In later versions, the 2-pounder was replaced by 6-pounders and then 75 mm guns. When production ended in 1944, 8,275 Valentines had been built, a greater number than any other British tank of the war.[38]
A 22 Infantry Tank Mk IV (Churchill) edit
The General Staff emphasis on heavy armour meant that the Valentine, like the Matilda was proof against German anti-tank guns in service from 1939–1940 and when German development of a 50 mm Pak 38 anti-tank gun became known, the War Office revised specifications to carry correspondingly more armour. in the A 22 Infantry Tank Mk IV (Churchill) an maximum armour thickness of 3 in (76 mm) was specified and then increased to 3.5 in (89 mm) as insurance against better German anti-tank guns.[39] The first Churchill tanks carried a maximum of 102 mm (4.0 in) of armour thickness and later versions a maximum of 152 mm (6.0 in). The Churchill Mk I carried a 2-pounder gun in the turret and a 3-inch howitzer in the hull; the CS version had the positions reversed. In later marks, the howitzer was replaced by a 2-pounder and then by a machine-gun. The tank was rushed into production and issued in 1941 with mechanical defects which took several years to remedy. In later marks, the turret 2-pounder was replaced by a 6-pounder and then a dual-purpose 75 mm gun.[40]
In the Mediterranean, about 200 Churchills were re-gunned with US 75 mm guns, salvaged from knocked out Sherman tanks; the new version was re-named the Churchill NA 75. In Normandy, when APDS ammunition became available, about one 75 mm-armed Churchill per troop was re-armed with a 6-pounder for greater anti-tank firepower. The Churchill tank eventually performed well and provided the hull for a series of specialised vehicles and 5,640 were built. The Churchill was found to have cross-country mobility superior to most other tanks designs of the war. A formula between length of track which was good for crossing obstacles and shortness of track to give good steering was found, in which the length of track touching the ground should be no greater than 1.8 times the distance apart of the middle of the track. A low centre of gravity was achieved in the Churchill; the track links had pronounced indentations and were supported for the length of the track by the large number of small road wheels.[41]
Infantry tank operations edit
France, 1940 edit
In 1940 the 1st Army Tank Brigade contained the 4th RTR and 7th RTR (the 8th RTR had no tanks and did not accompany the brigade). Each battalion had an establishment of 50 Infantry tanks, 7 light tanks and 8 Bren carriers. The 4th RTR was fully equipped with Matilda Infantry tanks and was based at Domart near the Somme. The 7th RTR arrived in early May 1940 with 27 Matilda Is, 23 Matilda II and 7 light tanks, some of the Matilda Is carrying bigger .5-inch Vickers machine-guns. Some consideration had been given to tactics and since the Matilda I had no anti-tank gun, it was judged suitable only to defend anti-tank guns against infantry attack, in an anti-tank defence zone behind the front line. Until the Matilda II replaced the Matilda I, the brigade was considered to be of limited use. When the Battle of France began on 10 May, the tanks were sent by rail into Belgium according to Plan D, reached Halle, Belgium on the night of 14/15 May and then took post in the Forêt de Soignes south-east of Brussels.[42]
After the German breakthrough on the Meuse the 1st Army Tank Brigade was ordered to Tournai but German bombing of the railways forced the tanks to move by road at a speed of around 3 mph (4.8 km/h). The Allies planned to make converging attacks on the German salient but locally, only a spoiling attack was intended, to interfere with German communications and ease the pressure on the defenders of Arras. Events reduced the attack to the brigade and two infantry battalions. Two columns were formed but the 120 mi (190 km) road march from Tournai reduced the number of tanks to 58 Matilda Is and 16 Matilda IIs. During the attack, the 2-pounder guns on the Matilda IIs were found to be effective against German tanks and that anti-tank fire from the panzers could not penetrate the British tanks. When the German tanks tried to overrun British infantry in captured villages, they found that the infantry 2-pounder anti-tank guns were just as potent. The 1st Army Tank Brigade was destroyed in the attack and the remaining tanks were organised as a composite tank regiment which made little impact for the rest of the campaign; the last two runners were disabled by their crews at Dunkirk.[43]
Egypt, 1940–1941 edit
Operation Compass was a British attack on the Italian 10th Army positions from Sidi Barrani and Maktila on the coast of western Egypt for about 60 mi (97 km). The 7th Royal Tank Regiment (7th RTR) was wholly equipped with Matilda IIs and was to support attacks on the camps by the 4th Indian Infantry Division. The most important objective was at Nibeiwa, which contained the Maletti Group, the main Italian armoured formation in Egypt. The camp had a stone wall, a minefield and an anti-tank ditch. To overcome the minefield, the British experimented with a mine plough on a Matilda I but none were ready for the attack. In training from September to December 1940, the 7th RTR followed MTP 22: at a rehearsal, the tanks waited for two hours for the artillery to bombard the fort and then advanced in three waves, the first to arrive twenty minutes ahead of the second wave and the infantry, the third wave comprising a reserve.[44] A modified plan for the attack was adopted, in which the artillery was to neutralise rather than destroy the Italians as the tanks advanced to get into the camp and conduct the destructive part of the attack; the infantry following in lorries and disembarking at the last moment. The revised plan was dependent on surprise and the invulnerability of the Matilda IIs to Italian weapons. The Infantry tanks made their approach at 7 mph (11 km/h) to reduce track wear and took two days to cover the 60 mi (97 km) to the vicinity of Nibeiwa. The tanks waited for 24 hours, about 5 mi (8.0 km) short of the objective for rest, maintenance and to rendezvous with the infantry.[45]
After diversions to muffle the sound of the tanks, the assembly of an infantry battalion near a gap in the anti-tank ditch and minefield and 15 minutes of artillery-fire, the tanks advanced at 7:30 a.m. A Squadron attacked on a two-troop front because of the width of the gap, two tanks leading each troop. Some tanks carried fascines to drop into the ditch but its depth had been overestimated and they were unnecessary. The British did not know that the Italians kept twenty-two M11/39 tanks in the gap at night but their crews were dismounted, had ignored the diversions and not moved out to battle positions. Most of the crews were killed by machine-gun fire; others mounted their tanks but these were knocked out by 2-pounder fire, all twenty-two M11/39s being destroyed for no loss. A Squadron tanks drove through the main gate or bashed through the perimeter wall and attacked the garrison with machine-gun fire. Some Italian soldiers fought back with hand grenades and hits from Italian anti-aircraft guns managed to jam some Matilda turrets but only one British tank was knocked out. The Indian infantry following B Squadron dismounted 200 yd (180 m) short of the main gate, charged into the camp through massed small-arms fire and took many prisoners.[46]
After the Italian surrender, B Squadron remained to cover the infantry against a counter-attack; A Squadron and the reserve drove to a rally point but five tanks ran onto mines en route and were immobilised. The remaining tanks refuelled, rearmed and made repairs, then headed for Tummar West with another infantry battalion. A dust storm forced the tanks to navigate by compass but the attack procedure on Nibeiwa was repeated and the Italian artillerymen were overwhelmed at their guns. Only nine tanks went on, the rest being retained as a defence against counter-attack, two of the nine being tanks that had run onto the minefield and been repaired. Tummar East was found empty, after the garrison had departed to counter-attack Nibeiwa and Tummar Central was captured. The tanks needed support from infantry and engineers to overcome obstacles and lift mines but when the Matildas penetrated the Italian defensive perimeter, the defence collapsed. Sidi Barrani, Bardia and Tobruk fell in turn, despite the wear and tear on the Matildas, which had to drive everywhere on their tracks. The bold use to tanks ahead of infantry was recognised in ATI 2 The Employment of Army Tanks in Co-operation with Infantry of March 1941.[47]
Operation Battleaxe edit

The 7th Armoured Division contained the 4th Armoured Brigade in command of the 4th Royal Tank Regiment (4th RTR) with 44- and the 7th Royal Tank Regiment (7th RTR) with 48-Matilda IIs, each with six light and two Cruiser command tanks. The 7th Armoured Brigade, had two Cruiser tank regiments to provide flank protection in the desert. The 4th Armoured Brigade came under the command of the 4th Indian Division for the attack on Halfaya. The 4th RTR was to use 18 Infantry tanks (1+1⁄2 squadrons) to support an attack by the Indians on Halfaya Pass near the coast and the rest of the brigade plus the Guards Brigade was to attack in the centre along the escarpment to capture Point 206 and Fort Capuzzo, to menace Bardia, Sollum and the rear defences of Halfaya Pass. The operation began on 14 June 1941 with a 32 mi (51 km) advance which continued into the night. When the attack began, the right-hand column, with six tanks of the 4th RTR, four tanks were disabled in a minefield and the infantry attack failed.[48]
On the left flank, the Infantry tanks drove slowly along the escarpment to reduce noise and formed two waves in advance of an infantry battalion by 5:40 a.m. and waited for a 25-pounder field gun bombardment. The bombardment was never fired as the guns bogged in soft sand; the attack began 6:00 a.m. after the right hand column was heard to be in action. Facing the British were four German 88 mm Flak 37 and eight 20 mm Flak guns and eight Italian 100 mm howitzers. One of the 88 mm guns was sent down the pass against the right hand column and the other three destroyed the British tanks at a range of 300 yd (270 m). The British tanks had advanced cautiously, attempting to find the southern flank of the Axis defences but by midday only one Matilda and a light tank were operational and the infantry attack had been repulsed. The rest of the 4th Armoured Brigade began its advance at 10:30 a.m., the 4th RTR to cover the left flank and capture Point 206 and the 7th RTR to take Fort Capuzzo. A Squadron of the 4th RTR, minus the two troops on the coast, led and overran post BP38 and the rest drove on towards Point 206, which was defended by a company of infantry, eight 105 mm leFH 18 light field howitzers, three 37 mm Pak 36 and three 50 mm Pak 38 anti-tank guns, plus two 20 mm Flak. Three tanks advanced on the position, one broke down and the other two were knocked out by the German gunners; two more tanks came forward to reconnoitre and were also knocked out.[49]
During the action at Point 206, a party of German armoured cars captured the garrison of three tanks and infantry left at BP38, before being forced back by artillery-fire. The four serviceable tanks attacked Point 206 again, three were knocked out and one forced to retreat. Later, the 16 Matildas of B Squadron attacked and captured the point after after a thorough artillery preparation which destroyed the Axis anti-tank guns and advancing with infantry support. The 7th RTR prepared to attack Fort Capuzzo at 1:30 p.m. against a garrison of a company of Italian troops and two 37 mm anti-tank guns. A German panzer regiment with another four 88 mm guns lay further west. When the Italians saw thirty Matildas (two squadrons) advancing, they retreated but five tanks on the left flank were disabled by 88 mm fire. The British repulsed several German counter-attacks and at 5:30 p.m. the Guards Brigade, escorted by the third Matilda squadron, arrived to consolidate. Only 17 Matildas were operational when the tanks moved to a rally point to the south at 9:30 p.m. On 15 June, German counter-attacks prevented the 4th Armoured Brigade from joining the 7th Armoured Brigade. The British knocked out 50 of the 80 panzers, which had come into range of the 2-pounder guns on the Matildas, to make their own armament effective. The Indians persisted with the attack on Halfaya Pass but with little tank support had no success; towards nightfall, a German panzer advance on the escarpment forced the British to retreat to avoid encirclement, the Infantry tanks escorting the Guards Brigade.[49]
The British lost 64 of about 90 Infantry tanks, which had lost their immunity to anti-tank fire; damaged tanks left on the battlefield during the retirement became total losses along with the write-offs. The British had advanced on well-prepared Axis positions against anti-tank guns dug in to engage British tanks from a flank; without sufficient artillery to destroy the Axis anti-tank guns and in a morning mist which reduced observation, the Infantry tanks could not hope to succeed; despite the disadvantages, the central column had still achieved its objectives. The battle was the lowest point of British infantry–tank co-operation; the tactic of preceding an infantry advance with a wave of Infantry tanks, to be followed up by infantry thirty minutes later, was only possible with a huge amount of artillery support. At Nibeiwa the tactic had worked because of surprise, the few anti-tank guns availablt to the defenders and a determined attack by the Indian infantry. Another reason for the failure of Battleaxe was that even the flawed tactics in use were not followed; the attack at Halfaya had no artillery support and tanks and infantry fought separate battles, partly due to the preparations for Battleaxe being rushed and partly due to high turnover of personnel in earlier battles.[50]
Britain, 1942 edit
| Year | UK | US | Total | German |
|---|---|---|---|---|
| 1939 | 969 | — | 969 | n/a |
| 1940 | 1,399 | — | 1,399 | 1,643 |
| 1941 | 4,841 | 1,390 | 6,231 | 3,806 |
| 1942 | 8,611 | 9,253 | 17,864 | 6,174 |
| 1943 | 7,476 | 15,933 | 23,409 | 11,961 |
| to June 1944 |
2,474 | 6,670 | 9,144 | 8,929 |
In 1942, the War Office began to publish Notes from Theatres of War (NTW) and Current Reports from Overseas (CRO) to communicate experience of recent operations. NTW 1 (19 February) contained lessons from Operation Crusader and NTWs 1 and 2 (7 March) covered events in Cyrenaica from November to December 1941 and operations in Russia in January 1942. Later issues covered longer periods and were issued after longer periods, NTW 6 of July 1942 covered Cyrenaica from November 1941 to January 1942. NTWs contained material assembled by the War Office and endorsed by the theatre HQ; the publication became the official line on lessons learned and were issued to the level of the company and its equivalents; by mid-1945, the series had reached NTW 21.[52]
NTW 16 of October 1943 covered the Tunisian Campaign and was derived from a document produced by Alexander and endorsed by Eisenhower. The document contained a description of the terrain, climate and characteristics of the Allied and German forces, an Outline of Operations, General Lessons, Lessons by Arms, Administrative Lessons and Enemy Methods. Lessons from overseas were sometimes peculiar to the environment and NTWs carried a warning that this should be borne in mind.[53] The CRO series contained findings before they had been endorsed by the War Office, to give unit commanders and training school Commandants quick access to information, with the proviso that if the details contradicted accepted theory, this would usually take precedence. CROs were not circulated below brigade headquarters until April 1944, when battalion HQs were included. After May 1943 CROs appeared weekly until June 1945.[53]
Training in Britain evolved independent of theory and in late 1942, when the 34th Tank Brigade was attached to the 43rd (Wessex) Infantry Division, a divisional tank–infantry battle drill already existed and had been demonstrated in August. At the end of November, the tank regiments took turns to exercise and after the first two sessions, a meeting to discuss lessons was held. The first tank echelon was criticised for pausing on an intermediate objective for too long after the infantry and the second tank wave had arrived and the infantry were also faulted for waiting for too long. Contrary to ATI 2, that the two waves of tanks should have gone first, up to 1,000 yd (910 m) ahead of the infantry, the infantry were sandwiched between them within 400 yd (370 m) of the first tank wave. In the last exercise, the tanks were watched as they "bounded" from one concealed place to another, with covering fire from the rest of the troop. The moves of the second echelon and the infantry and the quality of the fire-support afforded by each arm and the tank against anti-tank gun exchanges were also studied. Anti-tank guns were awarded a hit when they fired only when the tank was within 500 yd (460 m) and were penalised if poorly concealed. The vulnerability of anti-tank guns to attack from several directions was stressed along with the danger to tanks of entering the field of fire of an anti-tank gun one at a time, rather than en masse. The exercises showed an emphasis on manoeuvre by tank troops, squadrons and relative to the infantry, contrary to the 1939 and 1941 versions of Infantry tank theory; infantry support of the tanks was also explicit in the 43rd Division method, rather than the limited expectation in ATI 2. Infantry would be better supported by having one tank wave behind them and the tanks gained the advantage of infantry being able to spot anti-tank guns and engage crews with small-arms fire. The first tank wave, advancing behind an artillery barrage, might also expect covering fire from the infantry behind them.[54]
ATI 2 revised, May 1942 edit
ATI 3 reflected experience in France against German tanks and of the Western Desert Force against the Italian army, 1940–1941. After the failure of Battleaxe, ATI 2 The Employment of Army Tanks in Co-operation with Infantry (March 1941) was not revised.[44] After Operation Crusader (18 November – 30 December 1941) NTW 2 of 7 March 1942 asserted that the German 88 mm gun had ended the immunity of Matilda tanks to anti-tank gun fire and in NTW 4 (4 May 1942) the War Office punctured the "legend" it had helped to foster over Infantry tank invulnerability and emphasised that carefully laid plans and close all-arms co-operation were necessary for Infantry tank operations to succeed. Despite these publications, ATI 2 of 1941 was not rescinded until ATI 3 of May 1943 and Home Forces had to use ATI 2 as the main source of Infantry tank theory.[h] Technological and tactical change rapidly made written instructions obsolete, which rebounded on forces being trained in Britain.[19] The inadequacies of ATI 2 were visible even in training and when XII Corps conducted Exercise Greatbinge in November 1941, the danger of sending Infantry tanks forward beyond the support of other arms was evident in the records of the 25th Tank Brigade and the 4th Battalion, Somerset Light Infantry.[55] Later in 1942, reports from North Africa on the vulnerability of Infantry tanks advancing without infantry support prompted an evolution of tactics. The gap between the first wave and the infantry was reduced and then the positions reversed. A tank squadron of five troops followed a company of three infantry platoons, with the other two troops available for reinforcement or fire support from a flank.[56]
In May, a new version of ATI 2 was published which was a vast improvement on the 1941 edition. The vital importance of understanding between tanks and infantry was emphasised and the inherent limitations of tanks were acknowledged.[57] Far more detail was included on mines and other obstacles which had to be physically removed before tanks could attack; the nature of the ground behind an opposing position also had to be taken into account. Tank attacks worked best when concentrated on a narrow front and the selection of objectives needed to take account of the chronic difficulty of observation from within them; ideally, the objective should be visible from the start line. The new theory considered only attacks on prepared defences, for which the details of Axis dispositions should be obtained by air and ground reconnaissance. The attack would usually have three parts, initial penetration, assault on rearward defences, where minefields would be less of an obstruction, then open warfare. The new document did not specify infantry or tanks first but tanks in the assault echelon (replacing the term first echelon) were expected to have little effect due to minefields and other obstacles, best overcome by infantry and engineers. In the first phase, tanks would be further back in the support echelon (the old second echelon) providing fire-support to the assault echelon. As soon as the arm that went first reached the objective, it was vital for the following echelon quickly to move forward and join the assault echelon in the bridgehead beyond the minefield or other obstacle.[57]
Tunisia, 1943 edit
The 21st Army Tank Brigade, as part of the mixed 4th Infantry Division (6 June 1942 – 12 December 1943) and the independent 25th Army Tank Brigade, equipped with A 22 Infantry Tank Mk IV (Churchill) tanks, fought in the Tunisian Campaign.[i] The 25th Tank Brigade was criticised by the First Army commander for poor co-ordination with infantry; a report by the two brigade commanders described a dispersed version of the sandwich model. The first tank wave moved "at best tank pace", which enlarged the gap between the tanks and the following infantry but the commanders wrote that this never resolved the problem of anti-tank mines. If the route of approach was mined and the lie of the land had not been reconnoitred to discover wadis, the first wave of tanks would be held up and lose the barrage as it moved on and its suppressive effect on surviving Axis troops wore off. Even if more artillery was provided for contingencies and smoke was used for concealment, the attack would fail.[59]
The two tank brigades learned that they had insufficient means for reconnaissance to uncover possible obstacles. If the first tank wave reached the objective, the infantry behind would be forced under cover and the first wave would have to fight a lengthy and unsupported action on the objective. The first wave was abolished and the infantry went first with the tanks close behind, at a pace suitable for the infantry, ready to overtake the troops or divert to a flank to engage sources of fire holding up the infantry. The mine threat and awkward terrain remained but when tanks encountered them they were not isolated from infantry support. An anti-tank minefield was ignored by the infantry, who kept close to the barrage as the tanks looked for a way forward or waited for engineers to gap the minefield. The tanks did not need to be physically close to infantry as long as the crews could see them and were in range; the tanks could fire from hull-down locations, making it harder for Axis anti-tank gunners to hit them.[59]
Allowing the tanks freedom to manoeuvre to evade anti-tank guns contradicted former tank training, in which the tanks were bound to the infantry or vice versa or to creeping barrages. Experience in Tunisia led Infantry tank units to manoeuvre by troops and squadrons like armoured brigades. Infantry morale was highest when the tanks were nearby and the 1st Infantry Division claimed that no change to Infantry tank theory was needed, except for pauses to clear passages through minefields; tank casualties were preferable to losses among the infantry in reaching the objective. The infantry remarked on the reluctance of tanks to expose themselves on ridges, in preference for infantry moving ahead to eliminate lurking anti-tank guns and in replies to a questionnaire the division's comments included "...the A.Tk mine and hy [heavy] A.Tk gun has (sic) 'seen off' the tk to a great extent". The infantry were unmoved by the difficulties encountered by tanks but tank units wanted the freedom to move ahead, drop back or move to a flank as circumstances required.[60]
Normandy, 1944 edit
General Bernard Montgomery returned from the Mediterranean to command the 21st Army Group in early 1944 and deplored the differences between armoured brigades equipped with Cruiser tanks or American M4 Sherman tanks and tank brigades, three of which had Churchill tanks and five which had M4 Shermans. Montgomery imposed the Eighth Army method, in which the tanks took the lead again once the German anti-tank screen had been overcome. ****It was fortunate that British army training allowed latitude to commanders to adapt or on occasion ignore army training manuals and follow a pragmatic approach to tactics.**** From the Second Battle of El Alamein (23 October – 11 November 1942) German defensive tactics increasingly relied on anti-tank mines. Short-range Panzerfaust hollow charge weapons made close country and town fighting riskier for tanks and turret-less armoured vehicles carrying powerful anti-tank guns, could prevent the manoeuvre of British tanks in open country. In Normandy the Germans established an outpost line (Vorgeschobenestellung) with small parties of troops and artillery observers who kept Allied patrols out and forced attackers to deploy, which caused a delay. A main defensive line (Hauptkampflinie) 4,000–6,000 yd (2.3–3.4 mi; 3.7–5.5 km) further back contained the heavier anti-tank guns and self-propelled weapons; defensive positions in between contained machine-gun nests and some anti-tank guns.[61]
La Bijude and Epron edit
The villages of La Bijude and Epron are villages north of Caen in Normandy. In 1944 the villages were held by the 12th SS Panzer Division Hitlerjugend and were to be attacked during Charnwood by the 176th Infantry Brigade of the 59th (Staffordshire) Infantry Division, supported by the 13th/18th Royal Hussars of the 27th Armoured Brigade in amphibious Sherman DD tanks. A Squadron formed the reserve, B Squadron was under the command of the 6th Battalion, North Staffordshire Regiment on the right flank for La Bijude and C Squadron on the left flank under the 7th Battalion, Royal Norfolk Regiment for the attack on Epron. In phase I, La Bijude was to be attacked by B and C squadrons, each in support of one company of the 6th North Stafford and in phase II, C Squadron would revert to the 7th Norfolk for the attack on Epron. The tanks and infantry assembled at 2:00 a.m. (first light), B Squadron west of Château de la Londe and C Squadron to the east. Phase I began twenty minutes late at 4:20 a.m. towards the ruins of La Bijude, 500 yd (460 m) down the road. The preparatory artillery bombardment had raised a cloud of dust and smoke. At 5:15 a.m. B Squadron signalled that the village had been captured and that the tanks were on either side, C Squadron to the left. The infantry had taken cover and would not move into the village, possibly because German tanks had been seen, one being knocked out by B Squadron around 5:45 a.m. Without infantry, the British tanks withdrew, by when the position of the German defences had been discovered. The infantry occupied the village and dug in on the west side but declined to attack a German position further down the road, which had some dug in tanks and from where the Germans dominated the main road into Caen.[62]
Two Shermans were knocked out but by 12:40 p.m. B Squadron claimed two Panzer IV and three dug in tanks. Phase II began at 7:50 a.m.; the 7th Royal Norfolk were to advance to La Bijude, link with C Squadron and advance another 600 yd (550 m) to Epron. To avoid machine-gun fire from La Bijude, the infantry detoured to the east and C Squadron was exposed in the meantime. Two tank commanders became casualties and the squadron commander's Sherman was knocked out by a Panzerfaust; the commander continued on foot with the infantry. None of the radios of the 7th Royal Norfolk were working and messages to the 176th brigade HQ had to be sent via the tank sets.[63] At 8:30 a.m. the 7th Royal Norfolk reached the north end of Epron with C Squadron, after advancing in the open and suffering many casualties from flanking fire. By 1:00 p.m. the infantry reported that three platoons with three Sherman companies of C Squadron were through to the south of Epron but the announcement was premature and not corrected for some time. At 6:00 p.m. A Squadron received orders to detach a troop to the 7th Battalion, South Staffordshire Regiment in reserve and move to Epron at 8:00 p.m. Only one company was available when the troop reached the château, along with a composite company of the 7th Royal Norfolk. The HQ had been out of wireless contact since the morning and under the impression that Epron was secure. At 1:30 p.m. the tanks and infantry at La Bijude planned their attack on the German trenches west of the village. The 7th Battalion, South Staffordshire, less the company en route to Epron was to attack at 5:00 p.m. (later put back to 9:30 p.m.) supported by Churchill Crocodile flame-throwers and flail tanks.[64]
Aware that Epron had not been captured after all, tanks fired into Epron as the infantry advanced, found little resistance and took the the village and 15 prisoners by 10:00 p.m. The garrison had retreated after the 16th Luftwaffe Field Division on the right had withdrawn and uncovered the flank of the SS.[64] The attack on the German defences next to La Bijude began on time even though the infantry were thirty minutes late. Night was falling but the Crocodiles had great effect and half of the position was captured. The gains were relinquished in the dark and the tanks moved back near brigade HQ. In the morning, A Squadron examined the position and a similar attack began at 10:30 a.m. with fresh infantry. A creeping barrage moved at 100 yd (91 m) every 13 minutes and A Squadron fired smoke shell into the barrage as another squadron to the west fired HE. The infantry received casualties from the artillery-fire and held back until the barrage ended at noon. The tanks had gone forward, reached the position at 11:00 a.m. and taken some prisoners, having lost six tanks, one man killed and six wounded for a claim of six Panzer IV; co-operation between tanks and infantry had been poor. Despite two days' notice, the 13th/18th Hussars had moved forward from a rest area on the coast to assemble just before the attack and had no experience of working with the 59th (Staffordshire) Infantry Division. Tank-infantry co-operation suffered when communications broke down and accounts do not mention runners, despite the short distances involved. The tanks were a regular army unit and had been in action since D Day but the infantry were from a second line territorial division raised in 1939 on their debut; being described as "anything but impressive" by the Adjutant of the Hussars.[65]
Specialised Infantry tanks edit
Flail edit
Experiments were conducted with tanks equipped with Mine rollers and ploughs after the First World War with disappointing results. During the Second World War, more attempts were made to produce a mine clearing tank as German defensive positions became more formidable. Armoured vehicles were adapted from existing designs as mine defence became one of the most important tactical developments in North Africa. In Britain designs to overcome the Atlantic Wall defences were produced which gave rise to the Bullshorn, which was used in Normandy. Once the War Office had dropped a requirement that mine clearing tanks must be capable of operating as conventional tanks, experiments in North Africa, mine flails on rotating drums were fitted to the front of Matilda and Valentine tanks known as scorpions and American Grant tanks.[66] The Matilda Scorpion was an adaptation with a revolving drum mounted in front with a separate engine in a sponson on the right hand side (when facing forward) operated by a sapper who revolved the drum so its chains struck the ground and set off anti-tank mines; 24 Scorpions operated by the 42nd Royal Tank Regiment, 44th Royal Tank Regiment and troops from the RE, were operational by 23 October 1942. The vehicles were worn out, unreliable and slow-moving when flailing; desert dust was thrown up in prodigious amounts and the operator had to keep his head in, despite the lack of visibility, to avoid a pelting by sand, pebbles and the occasional mine.[67][j] Sherman Flails proved the most effective and in the Sherman Crab II, the projecting arms holding the flail automatically kept the flail at the right height over rough ground. So much dust was thrown up that bright lights were fitted to the back of the tanks and lane markers were fired into the ground.[68]
AVRE edit

After experiments with a Sherman tank and a Canadian Ram tank, Churchill tanks were used because their side doors made access easier. Turret baskets and much of the equipment in the hull removed to make room for engineers and their stores. A 290 mm spigot mortar replaced the main gun to fire a muzzle-loaded 40 lb (18 kg) demolition charge with a range of 80 yd (73 m). With such a short range no sights were carried and loading was by a gunner with a sliding cover in the redundant co-driver's position. The turret was traversed to rest over the hatch and the bomb was inserted from a loading trough which, with practice, could be done in 20 seconds. The Churchill AVRE also carried other devices, usually as a General Purpose type vehicle with 26 bombs for the mortar, Bangalore torpedoes, demolition charges and sundry engineers stores.[69] An AVRE could also carry a Small Box Girder bridge, 34 ft (10 m) long, weighing 4 long tons (4.1 t) and capable of bearing 40 long tons (41 t); the bridge was carried on the nose of the tank, raised near vertical. The Churchill bridgelayer had no turret and carried a 60 long tons (61 t) scissors-bridge laid hydraulically by the driver. The Churchill ARK (Armoured Ramp Carrier) was turretless and carried ramps at both ends. The driver would move forward into gap and the ramps would be lowered for other vehicles to drive over.[69]
Flamethrower tanks edit
During 1941, the War Office developed two designs of Valentine flame thrower tanks, one type operated by cordite and one by pressurised gas and chose the second design, to be mounted on Churchill tanks.[70] The Churchill Crocodile was a normal Churchill altered by a kit with a two-wheeled, armoured 6.5 long tons (6.6 t) trailer, which could be jettisoned, allowing the tank operate as a standard gun-armed tank. The trailer held 400 imp gal (1,800 L) of fuel and five bottles of nitrogen propellant. The fuel ran through the tank through an armoured hose and the projector replaced the hull machine-gun. The gunner had enough fuel for 80 one-second flames with a range of 80–100 yd (73–91 m) and the Crocodile was available for the Battle of Normandy (6 June – 30 August 1944).[71]
Canal Defence Light edit
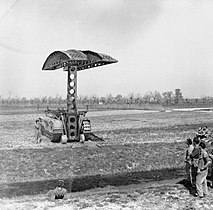
The Canal Defence Light was a searchlight with a device to cause the beam to flicker, which originated in 1937 as a private venture taken up by the War Office for evaluation. By coincidence, in 1938, the 1st RTR put lights on their tanks for better aim during night firing. The trial was a success but it was noted that the illumination should last no longer than 15 seconds to avoid marking the vehicle for opposing anti-tank guns. The light were used early in the Desert War but continuous light was found to be unnecessary. It was thought that the flickering CDL beam would confuse enemy gunners as the tanks attacked at night, the beams making an inverted V of dark forwards of the tanks in which infantry could advance unseen. The CDL was developed in great secrecy which may have led to an inadequate amount of testing on exercises where flaws would have been evident. That the dark Vs would have indicated the general position of the British infantry to German gunners appears to have been overlooked. A brigade of CDL tanks went to Normandy in 1944 but were not used until the crossing of the Rhine in 1945.[72]
Specialised Infantry tank operations edit
Western Desert edit
Alamein edit

Each Allied division in the attack was to gap its own minefields but the trials of Scorpion tanks showed that they were better treated as a bonus to conventional mine clearing. The Scorpions performed better than expected, despite the dilapidated and mechanically unreliable state of their Matilda chassis. Several vehicles broke down, including the two operating with the Australian Division; the New Zealand Division Scorpions were fairly effective.[73] During Operation Lightfoot, XIII Corps had to move through two minefields known as January and February to enable an armoured force to form a bridgehead beyond. The 44th Reconnaissance Regiment, mounted in Bren carriers took command of the 4th and elements of the 21st Field Squadron RE, a troop of Stuart tanks and six Scorpions. Four gaps were to be driven through the minefields, 350 yd (320 m) and 1,000 yd (910 m) deep respectively. The Scorpions, sappers and tank units had devised and rehearsed a co-operative method but the state of the ground and Axis counter-fire slowed the approach; scattered mines forced the Scorpions to begin flailing about 0.5 mi (0.80 km) before January. The Scorpions suffered breakdowns and mine damage, after which the engineers resorted to probing by hand.[74]
Mareth edit
The British intended to break through the Mareth Line in the north and then roll it up and the attack began on the night of 16/17 March 1943. The main attack crossed the Wadi Zeuss outpost line and moved 1 mi (1.6 km) beyond but the second attack a few miles to the south was a disaster, when profusions of hitherto rare anti-personnel S-mines were encountered. on 17 March an infantry battalion attacked in the north and gained a position overlooking the intended crossing point of the main defences, ready for a night attack on 20/21 March. Wadi Zigzaou was 80 yd (73 m) wide with very steep banks rising to 20 ft (6.1 m) high but the stream inside was shallow and firm; reconnaissance had discovered that the stream bed was mined and that an anti-tank ditch 100 yd (91 m) beyond was also mined. Two battalion-sized and three company-sized redoubts covered the obstacles. The British engineers were to blow in the sides of the wadi and the tanks carried fascines to drop into the wadi and the ditch. The fascines were tested by firing tracer into them but when mounted on Valentine tanks, the exhaust pipe running forwards from the engine and could set a fascine alight. The first step was to capture a feature known as the Bastion, then a minefield had to be crossed before reaching the wadi and ditch. [75]
The Bastion was captured after a hard fight and three Scorpions led the way through the minefield with few casualties and then two battalions attacked Wadi Zigzaou at two places 1,200 yd (1,100 m) apart. Rainfall further inland had increased the level of the water in the wadi and after four tanks crossed the wadi to drop fascines into the anti-tank ditch, the fifth fell through the wadi bed and sank up to the turret, blocking the way for tanks and engineers had to start building a causeway. No more tanks got across and after daybreak the effort was suspended. The infantry had kept going and slowly overcame the Mareth defences in slow, costly, step by step fighting. German reinforcements arrived and used machine-gun fire to pin down the British infantry. When British tanks appeared to suppress the machine-guns, they were ambushed by anti-tank guns. After dark, infantry reinforcements and the rest of the tanks got across but damage by the tanks' tracks made the crossing impossible for wheeled vehicles and no 6-pounder anti-tank guns could follow. The fresh infantry continued to crumble the Italian defences and many prisoners were taken. More inland rain raised the water level in the wadi again but by noon on 22 March, a route for wheeled vehicles was ready. Unfortunately for the British, a German counter-attack began at 12:40 p.m; only eight of the 51 British Valentines carried 6-pounder guns and were gradually knocked out.[76]
Attempts by Valentines to fetch 6-pounder anti-tank guns across the wadi failed because the 6-pounder gun did not fit the Valentine towing attachment and improvisations failed because they prevented the tanks from making sharp turns. Had the 6-pounder anti-tank guns been sent across the wadi first, defeat might have been avoided but the British were forced back over the wadi, having suffered 700 infantry casualties out of 900 men and 27 Valentines written off from 33 knocked out. Montgomery had refused an offer of a Churchill brigade for the attack and his apparent antipathy continued in the Normandy campaign. The result of the battle showed that specialised armoured vehicles had become essential for offensive operations against Axis positions and that the mass use of anti-personnel mines made hand probing much more difficult. Flail tanks became much more important as a substitute and had the British possessed Arks the challenge of getting over the Wadi would have been far easier to solve; had the fascines been carried by AVRE rather than Valentines, they would have been far easier to handle.[77]
NW Europe, 1944 edit
Operation Astonia edit

Operation Astonia was a British plan to capture Le Havre during September 1944. The British I Corps, part of the First Canadian Army, with the 49th (West Riding) Infantry Division and the 51st (Highland) Division was to capture the port. Le Havre was the most important of the Channel Ports still held by the Germans, having 8 mi (13 km) of quays. German troops occupied a swathe of coastal territory from the port to Bruges which had been under attack by the First Canadian Army since the start of September. Allied intelligence put the garrison at 8,700 troops but it turned out to be 12,000-men strong.[78][79] Behind Le Havre the ground rises steeply to high ground as far as the cliffs of Cap de la Hève and the coast to the north. The Lézarde and Fontaine river valleys cut the area into two plateaux, the north plateau being between the rivers and the south plateau to the south and west of the Fontaine, which overlooks the port; 3 mi (4.8 km) inland the south plateau is covered by the Fôret de Montgeon. The Germans had dug an anti-tank ditch from the Lézarde valley past Montivilliers to the coast at Octeville-sur-Mer, covered by minefields, barbed wire and concrete defensive positions. [79]
At the crest of the southern plateau, two fortified positions covered the town and port entrance and the Grand Clos coastal artillery battery could engage approaching ships. The garrison had plenty of machine-guns and mortars, but many of its anti-tank guns had been sent to Normandy and lost.[79] Near Fontaine La Mallet lay Strongpoint 8, with several concrete gun emplacements, the first of a series to cover the northern approaches to the port. The minefields and tank obstacles had been hurriedly built and were superimposed on an earlier and unfinished scheme based on strongpoints. West of Strongpoint 8 the ground is unsuitable for tanks but from the strongpoint to the Lézarde the ground is flat and unobstructed, with a gentle 200 yd (180 m)-slope on either side and the plateaux on both sides being at the same height as the strongpoint, which commanded the stream, whose banks were much soggier than the plateaux and would slow vehicles when at their most vulnerable. The anti-tank ditch was V-shaped, 22 ft (6.7 m) wide at the top and more than 12 ft (3.7 m) deep but not continuous and on the attack front of the 49th (West Riding) Infantry Division. East of Strongpoint 8 the ditch was near the top of the slope down to the stream, with the minefield in front. The 56th Infantry Brigade (Brigadier M.S. Ekin) was to conduct the attack on the 49th Division front.[80]

During the North-west Europe Campaign (6 June 1944 – 8 May 1945), British specialist tanks were held in the 79th Armoured Division (Major-General Percy Hobart) and attached to other units for particular operations.[81][k] For Astonia, the 79th Armoured Division provided the 49th Division with the 222nd Assault Squadron RE (AVRE), two Crab squadrons of the 22nd Dragoons and a Crocodile squadron of the 141st Regiment Royal Armoured Corps (141 RAC). The division also had the 34th Armoured Brigade and the 1st Canadian Armoured Carrier Regiment with 44 Kangaroos under command. In the I Corps plan, phase I had the 49th (West Riding) Division breaking through on the northern front capture strongpoints to the south and cross the Fontaine. In phase IIa the Highlanders would break through on the right and in IIb the 49th Division was to capture the southern plateau. In phase II the Highlanders would take the ground around Octeville and the heights north of Le Havre and in phase IV, all forces were ruthlessly to exploit opportunities to capture the town.[82]
During the attack preparations, RAF Bomber Command conducted several raids on the port and its defences, despite persistent rain, which forced a postponement of the ground attack to 10 September. Eight field regiments, six medium regiments, a heavy regiment and several heavy anti-aircraft batteries added the fire of 350 guns to the air bombardment. The 56th Infantry Brigade had to break through the northern defences and make crossings of the Fontaine for the 147th Infantry Brigade to pass through; the 51st (Highland) Division was to stage a diversion closer to Octeville and the 146th Infantry Brigade was to attack from the east across the Lézarde.From 5:45 p.m. the 56th Infantry Brigade would breach the minefield and parts of the anti-tank ditch on a two battalion front, led the Crabs of the 22nd Dragoons in phase Ia and in I b the third battalion mounted in Kangaroos would take strongpoints 1–7, then cross the Fontaine. The two attacking battalions and about 130 tracked vehicles and their supplies moved up during the night of 9/10 September. The force assembled about 3,000 yd (2,700 m) north-east of the anti-tank ditch, much impeded by mud; several Crabs bogged and the rest had to complete the move the next day under a smoke screen.[83]
Gallery edit
-
 Churchill Arks, Sherman Crabs and infantry following the assault on Le Havre, 13 September 1944
 -
 Sherman crab flail tank
 -
 290 mm Petard mortar on a Churchill AVRE
 -
 Churchill bridgelayer (51st RTR)
 -
 Churchill Ark Mk II (UK pattern) bridging vehicle
 -
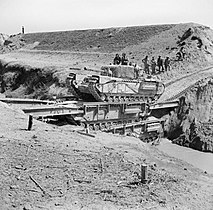 Churchill tank crossing the Senio (Italy) over two Churchill Arks
 -
 Churchill Crocodile demonstration
 -
 Churchill Mk VII Crocodile with fuel trailer
 -
 Matilda CDL


_(4536634636).jpg)
Aftermath edit
Analysis edit
British tank experiments in the late 20s demonstrated the practical demands of maintaining an armoured force but also the potential of armoured forces for fast manoeuvre, capable of surprising a defender. The trials of 1927 and 1928 showed that tanks could deliver firepower at the decisive point, provided that supply and communication could be assured. In the early 30s, deep penetration operations were examined and the vital importance of communication by wireless established. By 1934, the "...flexibility, mobility and firepower of armoured forces consistently proved superior to those of more conventional forces".[84]
The Matilda had performed well against the Germans at the Battle of Arras and in Operation Compass, where it outclassed Italian tanks and the tank was immune to standard Italian and German anti-tank guns from 1940–1941. Tactics reflected the fact that Matildas could drive where they pleased, on which the practice of preceding an infantry attack with a wave of Infantry tanks was based. When the Germans deployed guns capable of penetrating Matilda armour, the period of superiority was ended and after Battleaxe, Infantry tank tactics became much more cautious. Minefields had also been an effective counter to tank manoeuvre and means to counter the mine danger began the development of vehicles much more specialised than the Infantry/Cruiser split, which began the replacement of Infantry tanks in attacks on well-prepared defences.[85] The Matilda was was too slow to match the tempo of German panzer operations and its 2-pounder gun had no high explosive ammunition to bombard Axis defences containing anti-tank guns.[l] German guns had bullet-proof shields, which limited the effect of machine-gun fire; on occasion British Infantry tanks drove over them, for want of an alternative.[86]
MTPs, ATM, ATI, NTW and CROs provide a picture of military theory as it evolved before D Day. Reports after 6 June show changes in theory and the flaws in Home Forces and 21st Army Group training.[87] On 25 June 1944, Montgomery stopped the circulation of after-action reports because they were "unduly influenced by local conditions", a euphemism for accurate reports on the challenges faced by the British in Normandy. A report by Lieutenant-Colonel A. H. Pepys of 19 June, included comment that German Tiger and Panther tanks outclassed Cromwell and Sherman tanks as much as Panzer III and IVs had against the Crusaders and Honeys of 1941. The passage was suppressed before the report was passed to the War Office and SHAEF but the effect of censorship was limited by word of mouth. When the 107th RAC, part of the 34th Tank Brigade reached Normandy, visitors from the 11th Armoured Division said that even their Churchills were outclassed by German tanks; circulation of CROs resumed in late July.[88]
See also edit
Notes edit
- ^ In 1923, British medium tanks had achieved a speed of 20 mph (32 km/h)[1]
- ^ A plan was laid to advance on a wide front with mixed units of armoured cars, light tanks, motorised infantry and the Vickers Medium Tanks. The faster vehicles would arrive at the canal and seize crossings for the medium tanks and the raids would begin at dawn on the next day but Hobart rejected the plan over the division of the Tank Brigade in mixed columns.[12]
- ^ In the first year of the war ATM appeared monthly, then intermittently with 29 issues being published by the end of the war. ATM 33 was published on 2 July 1940, only eleven days after the report contained the findings of the Bartholomew Committee on the lessons of the debacle in France was written.[18]
- ^ Spending on tracked vehicles increased to £501,000 in 1934–35, £842,000 in the financial year 1936–37 and surged to £3,627,000 in the 1937–38 financial year.[24]
- ^ The A9 had 14 mm (1 in) of armour, weighed 12 long tons (12 t) and had a speed of 23 mph (37 km/h); the A10 weighed weighed 14.3 long tons (15 t), had 30 mm (1 in) of armour and a speed of only 16 mph (26 km/h)[26]
- ^ German Panzer III and IV tanks in the desert carried a maximum of 65 mm (2.6 in) armour thickness, the Matilda had 78 mm (3.1 in) of armour on the front and 75 mm (3.0 in) on the turret, the Valentine had 65 mm (2.6 in) on the turret and 60 mm (2.4 in) on the hull front. The Cromwell cruiser had 76 mm (3.0 in) turret armour and 63 mm (2.5 in) on the hull front; the early versions of the Churchill had 88 mm (3.5 in) on the turret and 101 mm (4.0 in) armour on the hull front.[28]
- ^ Data from CSO, Statistical digest... Table 126 and USSBS Tank Industry Report, Jan 1947 2nd ed. p. 14.[51]
- ^ The swift increase in the number of British tank formations created great demand for information and in 1943, MTP 41 replaced ATI 3.[55]
- ^ Mixed divisions were a failed experiment to increase tank-infantry co-ordination by replacing one of the three infantry brigades of an infantry division with a tank brigade. Training was simplified but when the 4th Infantry Division, the only mixed division to see action, reached Tunisia it was found to lack sufficient infantry to exert constant pressure.[58]
- ^ An anecdote went round that an Italian prisoner had said that seeing an advancing mountain of dust, emitting loud cranking, rattling and grinding noises, had been worse than the artillery bombardment.[67]
- ^ The division contained vehicles not derived from Infantry tanks, including two regiments of Kangaroo armoured infantry carriers, amphibious Sherman DD tanks, Landing Vehicle Tracked (Bufffalo) and Terrapin amphibious landing vehicles.[81]
- ^ Later Infantry tanks carried 6-pounder and then 75 mm guns, which had high explosive ammunition.[85]
Footnotes edit
- ^ Murray & Millet 2006, p. 25.
- ^ a b Harris 1995, pp. 218–219.
- ^ Harris 1995, pp. 220–221, 225, 228.
- ^ Harris 1995, p. 244.
- ^ Harris 1995, pp. 222–223.
- ^ Harris 1995, pp. 224–225.
- ^ Plant 2014a, pp. 7–8.
- ^ Plant 2014a, pp. 13–14.
- ^ Harris 1995, pp. 247–248.
- ^ Harris 1995, pp. 248–249.
- ^ Harris 1995, pp. 249–250.
- ^ Harris 1995, p. 250.
- ^ Harris 1995, pp. 250–251.
- ^ Plant 2014a, pp. 31–33.
- ^ French 2001, pp. 33–34.
- ^ Plant 2014, pp. 21–22.
- ^ Postan 1952, p. 103.
- ^ a b Place 2000, p. 10.
- ^ a b Place 2000, pp. 11–12.
- ^ Place 2000, p. 131.
- ^ Plant 2014, pp. 32–33.
- ^ Harris 1995, p. 238.
- ^ a b c French 2001, p. 97.
- ^ a b Harris 1995, p. 237.
- ^ Harris 1995, pp. 238–239.
- ^ a b Plant & 2014a, p. 30.
- ^ Postan 1952, pp. 186–187.
- ^ Postan 1952, p. 187.
- ^ Postan 1952, pp. 187–188.
- ^ Postan 1952, pp. 192–193, 189.
- ^ Postan 1952, pp. 189–192.
- ^ a b Postan 1964, p. 329.
- ^ Postan 1964, pp. 329–340.
- ^ Harris 1995, pp. 240–241.
- ^ Postan 1964, pp. 313, 316.
- ^ a b Plant 2014, p. 27.
- ^ Postan 1964, p. 365.
- ^ Plant 2014, pp. 27–28.
- ^ Postan 1952, pp. 185–186.
- ^ Plant 2014, pp. 28–29.
- ^ Plant 2014, pp. 28–30.
- ^ Plant 2014, pp. 41–42.
- ^ Plant 2014, pp. 43–47.
- ^ a b Place 2000, p. 132.
- ^ Plant 2014, pp. 48–49.
- ^ Plant 2014, pp. 49–51.
- ^ Plant 2014, pp. 51–52; Place 2000, p. 132.
- ^ Plant 2014, pp. 54–55.
- ^ a b Plant 2014, pp. 54–56.
- ^ Plant 2014, pp. 56–60.
- ^ a b Edgerton 2011, p. 220.
- ^ Place 2000, p. 12.
- ^ a b Place 2000, p. 13.
- ^ Place 2000, pp. 134–135.
- ^ a b Place 2000, p. 134.
- ^ Plant 2014, p. 60.
- ^ a b Place 2000, p. 139.
- ^ Place 2000, pp. 92–93.
- ^ a b Place 2000, pp. 137–138.
- ^ Place 2000, pp. 138–139.
- ^ Plant 2014, pp. 60–61.
- ^ Plant 2014, pp. 64–67.
- ^ Plant 2014, pp. 66–67.
- ^ a b Plant 2014, pp. 67–68.
- ^ Plant 2014, pp. 68–69.
- ^ Plant 2014, pp. 82–83; Postan 1964, p. 342.
- ^ a b Playfair 2004, p. 14.
- ^ Plant 2014, pp. 82–83.
- ^ a b Plant 2014, pp. 83–84.
- ^ Postan 1964, p. 342.
- ^ Plant 2014, p. 85; Postan 1964, p. 342.
- ^ Plant 2014, p. 86.
- ^ Playfair 2004, p. 38.
- ^ Playfair 2004, pp. 42–43.
- ^ Plant 2014, pp. 97–98.
- ^ Plant 2014, pp. 99–101.
- ^ Plant 2014, pp. 101–102.
- ^ Plant 2014, p. 118.
- ^ a b c Ellis 2004, p. 13.
- ^ Plant 2014, pp. 119–120.
- ^ a b Plant 2014, p. 85.
- ^ Plant 2014, pp. 122–123.
- ^ Plant 2014, pp. 124–125.
- ^ Murray & Millet 2006, pp. 26–27.
- ^ a b Plant 2014, p. 78.
- ^ French 2001, pp. 97–98; Harris 1995, pp. 209–301, 303, 305.
- ^ Place 2000, p. 14.
- ^ Place 2000, pp. 14–15.
References edit
- Edgerton, D. (2011). Britain's War Machine: Weapons, Resources, and Experts in the Second World War. London: Allen Lane. ISBN 978-0-7139-9918-1.
- Ellis, Major L. F.; with Warhurst, Lieutenant-Colonel A. E. (2004) [1st. pub. HMSO 1968]. Butler, J. R. M. (ed.). Victory in the West: The Defeat of Germany. History of the Second World War United Kingdom Military Series. Vol. II. Naval & Military Press. ISBN 978-1-84574-059-7.
- French, David (2001) [2000]. Raising Churchill's Army: The British Army and the War Against Germany 1919–1945. Oxford: Oxford University Press. ISBN 978-0-19-924630-4.
- Harris, J. P. (1995). Men, Ideas and Tanks: British Military Thought and Armoured Forces, 1903–1939. Manchester: Manchester University Press. ISBN 978-0-7190-4814-2.
- Murray, W.; Millett, A. R. (2006) [1996]. Military Innovation in the Interwar Period (17th ed.). New York: Cambridge University Press. ISBN 978-0-521-63760-2.
- Place, T. H. (2000). Military Training in the British Army, 1940–1944: From Dunkirk to D-Day. Cass Military History and Policy (pbk. ed.). London: Frank Cass. ISBN 978-0-7146-8091-0.
- Plant, J. (2014). Infantry Tank Warfare (rev. enl. ed.). London: New Generation. ISBN 978-1-78507-158-4.
- Plant, J. (2014a). Cruiser Tank Warfare. London: New Generation. ISBN 978-1-910394-17-5.
- Playfair, Major-General I. S. O.; and Molony, Brigadier C. J. C.; with Flynn RN, Captain F. C.; Gleave, Group Captain T. P. (2004) [HMSO 1966]. Butler, J. R. M. (ed.). The Mediterranean and Middle East: The Destruction of the Axis Forces in Africa. History of the Second World War United Kingdom Military Series. Vol. IV. Uckfield: Naval & Military Press. ISBN 978-1-84574-068-9.
- Postan, M. M. (1952). British War Production. History of the Second World War: United Kingdom Civil Series. London: HMSO. OCLC 459583161.
- Postan, M. M.; Hay, D.; Scott, J. D. (1964). Hancock, K. (ed.). Design and Development of Weapons: Studies in Government and Industrial Organisation. History of the Second World War, United Kingdom Civil Series. London: HMSO & Longmans, Green & Co. ISBN 978-0-11630-089-8.
Further reading edit
Books
- Anderson, R. C. (2010). Cracking Hitler's Atlantic Wall: The 1st Assault Brigade Royal Engineers on D-Day. Mechanicsburg, PA: Stackpole Books. ISBN 978-0-8117-0589-9.
- Buckley, John (2006) [2004]. British Armour in the Normandy Campaign 1944. London: Taylor & Francis. ISBN 978-0-415-40773-1.
- Chamberlain, Peter; Ellis, Chris (1969). British and American Tanks of World War II: The Complete Illustrated History of British, American and Commonwealth Tanks, Gun Motor Carriages and Special Purpose Vehicles, 1939–1945. New York, NY: Arco. ISBN 978-0-668-01867-8.
- Edgerton, D. (2008) [2006]. Warfare State: Britain, 1920–1970 (pbk. ed.). Cambridge: Cambridge University Press. ISBN 978-0-521-67231-3.
- Fletcher, D. (1993) [1989]. The Great Tank Scandal: British Armour in the Second World War Part 1. London: HMSO. ISBN 978-0-11-290534-9.
- Fletcher, D. (1993). The Universal Tank: British Armour in the Second World War Part 2. London: HMSO, for REME Museum. ISBN 978-0-11-290534-9.
- Fletcher, D. (1994). Matilda Infantry Tank 1938–1945. New Vanguard. Oxford: Osprey. ISBN 978-1-85532-396-4.
- Foley, J. (1975) [1957]. Mailed Fist (repr. Mayflower Books, St Albans ed.). London: Panther Books. pp. 98–104. ISBN 978-0-583-12491-1.
- Hamilton, S. (1995). Armoured Odyssey: 8th Royal Tank Regiment in the Western Desert 1941–1942, Palestine, Syria, Egypt 1943–1944, Italy 1944–1945 (1st ed.). London: Tom Donovan. ISBN 978-1-871085-30-3.
- Heigl, Fritz (1927). Taschenbuch der Tanks: Räder-Raupenfahrzeuge, moderne Tanktaktik, neue Tanks [Pocket Book of Tanks: Wheeled, Tracked vehicles, Modern Tank Tactics, New Tanks] (in German). München: J. F. Lehmanns Verlag. OCLC 53231773.
- Mechanized and Armoured Formations (Instructions for Guidance when Considering their Action). London: HMSO for War Office. 1929. OCLC 222912835.
- Modern Formations: Provisional. London: HMSO for War Office. 1931. OCLC 220629467.
- Ness, L. (2002). Jane's World War II Infantry tanks and Fighting Vehicles: The Complete Guide (PDF) (online ed.). London: HarperCollins. ISBN 978-0-00-711228-9. Retrieved 10 September 2017.
- Tucker, Spencer (2004). Tanks: An Illustrated History of Their Impact. Weapons and Warfare. Santa Barbara, CA: ABC-Clio Information Services. ISBN 978-1-57607-995-9.
- White, B. T. (1963). British Tanks 1915–1945. London: Ian Allen. OCLC 799775831.
Theses
- Armstrong, G. P. (1976). The Controversy over Tanks in the British Army 1919 to 1933 (PhD thesis). King's College London (University of London). OCLC 500372423. uk.bl.ethos.448107. Retrieved 2 November 2016.
- Coombs, B. (2011). British Tank Production, 1934–1945 (PhD thesis). University of Kent. OCLC 872698322. uk.bl.ethos.590028. Retrieved 10 March 2016.
- Forrester, C. J. (2010). Montgomery and his Legions: A Study of Operational Development, Innovation and Command in 21st Army Group, North-West Europe, 1944–45 (PhD thesis). University of Leeds. OCLC 767733859. uk.bl.ethos.540781. Retrieved 2 November 2016.
- Salmon, R. E. (2013). The Management of Change: Mechanizing the British Regular and Household Cavalry Regiments 1918–1942 (PhD thesis). University of Wolverhampton. OCLC 879390776. uk.bl.ethos.596061. Retrieved 10 March 2016.
Tanks of the First World War | |
|---|---|
| Light | |
| Medium | |
| Heavy | |
| Prototypes, experimentals | |