| Gallipoli campaign | |||||||||
|---|---|---|---|---|---|---|---|---|---|
| Part of the Middle Eastern theatre of the First World War | |||||||||
 A collection of photographs from the campaign. From top and left to right: Ottoman commanders including Mustafa Kemal (fourth from left); Entente warships; V Beach from the deck of SS River Clyde; Ottoman soldiers in a trench; and Entente positions | |||||||||
| |||||||||
| Belligerents | |||||||||
|
Naval support: |
Supported by: | ||||||||
| Commanders and leaders | |||||||||
| Units involved | |||||||||
|
Egyptian Labour Corps[4] Maltese Labour Corps[4] |
| ||||||||
| Strength | |||||||||
|
5 divisions (initial)
Supported by: |
6 divisions (initial)
| ||||||||
| Casualties and losses | |||||||||
|
Total: 300,000 (56,707 dead)[10] |
Total: 255,268 (56,643 dead)[6][11] | ||||||||
The Gallipoli campaign, the Dardanelles campaign, the Defence of Gallipoli or the Battle of Gallipoli (Turkish: Gelibolu Muharebesi, Çanakkale Muharebeleri or Çanakkale Savaşı) was a military campaign in the First World War on the Gallipoli peninsula (now Gelibolu) from 19 February 1915 to 9 January 1916. The Entente powers, Britain, France and the Russian Empire, sought to weaken the Ottoman Empire, one of the Central Powers, by taking control of the Ottoman straits. This would expose the Ottoman capital at Constantinople to bombardment by Entente battleships and cut it off from the Asian part of the empire. With the Ottoman Empire defeated, the Suez Canal would be safe and the Bosphorus and Dardanelles straits would be open to Entente supplies to the Black Sea and warm-water ports in Russia.
In February 1915 the Entente fleet failed when it tried to force a passage through the Dardanelles. The naval action was followed by an amphibious landing on the Gallipoli peninsula in April 1915. In January 1916, after eight months' fighting, with approximately 250,000 casualties on each side, the land campaign was abandoned and the invasion force was withdrawn. It was a costly campaign for the Entente powers and the Ottoman Empire as well as for the sponsors of the expedition, especially the First Lord of the Admiralty (1911–1915), Winston Churchill. The campaign was considered a great Ottoman victory. In Turkey, it is regarded as a defining moment in the history of the state, a final surge in the defence of the motherland as the Ottoman Empire retreated. The struggle formed the basis for the Turkish War of Independence and the declaration of the Republic of Turkey eight years later, with Mustafa Kemal Atatürk, who rose to prominence as a commander at Gallipoli, as founder and president.
The campaign is often considered to be the beginning of Australian and New Zealand national consciousness. The anniversary of the landings, 25 April, is known as Anzac Day, the most significant commemoration of military casualties and veterans in the two countries, surpassing Remembrance Day (Armistice Day).[12][13][14]
Background edit
On 29 October 1914, two former German warships, the Ottoman Yavûz Sultân Selîm and Midilli, conducted the Black Sea raid, in which they bombarded the Russian port of Odessa and sank several ships.[15] On 31 October, the Ottomans entered the war and began the Caucasus campaign against Russia. The British briefly bombarded forts in Gallipoli, invaded Mesopotamia and studied the possibility of forcing the Dardanelles.[16][17]
Entente strategy and the Dardanelles edit
Before the Dardanelles operation was conceived, the British had planned to conduct an amphibious invasion near Alexandretta on the Mediterranean, an idea originally presented by Boghos Nubar in 1914.[18] This plan was made by the Secretary of State for War, Field Marshal Earl Kitchener, to sever the Ottoman capital from Syria, Palestine and Egypt. Alexandretta was an area with a Christian population and was the strategic centre of the Ottoman railway network; its capture would cut the empire in two. Vice Admiral Sir Richard Peirse, Commander-in-Chief, East Indies, ordered Captain Frank Larkin of HMS Doris to Alexandretta on 13 December 1914. The Russian cruiser Askold and the French cruiser Requin were also present. Kitchener was working on the plan in March 1915, the beginning of the British attempt to incite an Arab Revolt. The Alexandretta landing was abandoned because militarily it would have required more resources than France could allocate and politically France did not want the British operating in their sphere of influence, a position to which Britain had agreed in 1912.[19]
By late 1914, on the Western Front, the Franco–British counter-offensive of the First Battle of the Marne had ended and the Belgians, British and French had suffered many casualties in the First Battle of Ypres in Flanders. The war of manoeuvre had evolved into trench warfare.[20] The German Empire and Austria-Hungary closed the overland trade routes between Britain and France in the west and Russia in the east. The White Sea in the Arctic and the Sea of Okhotsk in the Far East were icebound in winter and distant from the Eastern Front; the Baltic Sea was blockaded by the Kaiserliche Marine (Imperial German Navy) and the entrance to the Black Sea through the Dardanelles was controlled by the Ottoman Empire.[21] While the Ottomans remained neutral, supplies could still be sent to Russia through the Dardanelles but prior to the Ottoman entry into the war, the straits had been closed; in November the Ottomans began to mine the waterway.[22][23]

The French Minister of Justice, Aristide Briand, proposed in November to attack the Ottoman Empire but this was rejected and an attempt by the British to bribe the Ottomans to join the Entente side also failed.[24] Later that month, Winston Churchill, First Lord of the Admiralty, proposed a naval attack on the Dardanelles, based in part on erroneous reports of Ottoman troop strength. Churchill wanted to use a large number of obsolete battleships, which could not operate against the German High Seas Fleet, in a Dardanelles operation, with a small occupation force provided by the army. It was hoped that an attack on the Ottomans would also draw Bulgaria and Greece (formerly Ottoman possessions) into the war on the Entente side.[25] On 2 January 1915, Grand Duke Nicholas of Russia appealed to Britain for assistance against the Ottomans, who were campaigning in the Caucasus.[26] Planning began for a naval demonstration in the Dardanelles, to divert Ottoman troops from Caucasia.[27]
Attempt to force the Straits edit
.JPG)
On 17 February 1915, a British seaplane from HMS Ark Royal flew a reconnaissance sortie over the Straits.[28] Two days later, the first attack on the Dardanelles began when an Anglo-French flotilla, including the British dreadnought HMS Queen Elizabeth, began a long-range bombardment of Ottoman coastal artillery batteries. The British had intended to use eight aircraft from Ark Royal to spot for the bombardment but only one of these, a Short Type 136, was serviceable.[29] A period of bad weather slowed the initial phase but by 25 February the outer forts had been reduced and the entrance cleared of mines.[30] Royal Marines were landed to destroy guns at Kum Kale and Seddülbahir, while the naval bombardment shifted to batteries between Kum Kale and Kephez.[31]
Frustrated by the mobility of the Ottoman batteries, which evaded the Entente bombardments and threatened the minesweepers sent to clear the Straits, Churchill began pressuring the naval commander, Admiral Sackville Carden, to increase the fleet's efforts.[32] Carden drew up fresh plans and on 4 March sent a cable to Churchill, stating that the fleet could expect to arrive in Istanbul within 14 days.[33] A sense of impending victory was heightened by the interception of a German wireless message that revealed the Ottoman Dardanelles forts were running out of ammunition.[33] When the message was relayed to Carden, it was agreed the main attack would be launched on or around 17 March. Carden, suffering from stress, was placed on the sick list by the medical officer and command was taken over by Admiral John de Robeck.[34]
18 March 1915 edit

On the morning of 18 March 1915, the Entente fleet, comprising 18 battleships with an array of cruisers and destroyers, began the main attack against the narrowest point of the Dardanelles, where the straits are 1 mi (1.6 km) wide. Despite some damage to the Entente ships by Ottoman return fire, minesweepers were ordered along the straits. In the Ottoman official account, by 2:00 p.m. "all telephone wires were cut, all communications with the forts were interrupted, some of the guns had been knocked out ... in consequence the artillery fire of the defence had slackened considerably".[35] The Bouvet struck a mine, causing her to capsize in two minutes, with just 75 survivors out of 718 men.[36] Minesweepers, manned by civilians, retreated under Ottoman artillery fire, leaving the minefields largely intact. HMS Irresistible and HMS Inflexible struck mines and Irresistible was sunk, with most of her surviving crew rescued; Inflexible was badly damaged and withdrawn. There was confusion during the battle about the cause of the damage; some participants blaming torpedoes. HMS Ocean was sent to rescue Irresistible but was disabled by a shell, struck a mine and was evacuated, eventually sinking.[37]
The French battleships Suffren and Gaulois sailed through a new line of mines placed secretly by the Ottoman minelayer Nusret ten days before and were also damaged.[38] The losses forced de Robeck to sound the "general recall" to protect what remained of his force.[39] During the planning of the campaign, naval losses had been anticipated and mainly obsolete battleships, unfit to face the German fleet, had been sent. Some of the senior naval officers like the commander of Queen Elizabeth, Commodore Roger Keyes, felt that they had come close to victory, believing that the Ottoman guns had almost run out of ammunition but the views of de Robeck, the First Sea Lord Jackie Fisher and others prevailed. Entente attempts to force the straits using naval power were terminated, due to the losses and bad weather.[39][34][40] Planning to capture the Ottoman defences by land, to open the way for the ships, began. Two Entente submarines tried to traverse the Dardanelles but were lost to mines and the strong currents.[41]
Prelude edit
Entente preparations edit

After the failure of the naval attacks, troops were assembled to eliminate the Ottoman mobile artillery, which was preventing the Entente minesweepers from clearing the way for the larger vessels. Kitchener appointed General Sir Ian Hamilton to command the 78,000 men of the Mediterranean Expeditionary Force (MEF).[34] Soldiers from the Australian Imperial Force (AIF) and New Zealand Expeditionary Force (NZEF) were encamped in Egypt, undergoing training prior to being sent to France.[42] The Australian and New Zealand troops were formed into the Australian and New Zealand Army Corps (ANZAC), commanded by Lieutenant General Sir William Birdwood, comprising the volunteer 1st Australian Division and the New Zealand and Australian Division. The ANZAC troops were joined by the regular 29th Division and the Royal Naval Division.[28] The French Corps expéditionnaire d'Orient (Orient Expeditionary Corps), initially consisting of two brigades within one division, was subsequently placed under Hamilton's command.[43][44][45][a]
Over the following month, Hamilton prepared his plan and the British and French divisions joined the Australians in Egypt. Hamilton chose to concentrate on the southern part of the Gallipoli peninsula at Cape Helles and Seddülbahir, where an unopposed landing was expected.[47][dubious ] The Entente initially discounted the fighting ability of the Ottoman soldiers.[48] The naïveté of the Entente planners was illustrated by a leaflet that was issued to the British and Australians while they were still in Egypt,
Turkish soldiers as a rule manifest their desire to surrender by holding their rifle butt upward and by waving clothes or rags of any colour. An actual white flag should be regarded with the utmost suspicion as a Turkish soldier is unlikely to possess anything of that colour.[49]

The underestimation of Ottoman military potential stemmed from a "sense of superiority" among the Entente, because of the decline of the Ottoman Empire and its poor performance in Libya during the Italo-Turkish War of 1911–1912 and the Balkan Wars of 1912 and 1913. Entente intelligence failed to adequately prepare for the campaign, in some cases relying on information gained from Egyptian travel guides.[50][51] The troops for the assault were loaded on transports in the order they were to disembark, causing a long delay which meant that many troops, including the French at Mudros, were forced to detour to Alexandria to embark on the ships that would take them into battle.[52] A five-week delay until the end of April ensued, during which the Ottomans strengthened their defences on the peninsula, although bad weather during March and April might have delayed the landings anyway, preventing supply and reinforcement.[53] Following preparations in Egypt, Hamilton and his headquarters staff arrived at Mudros on 10 April.[54] The ANZAC Corps departed Egypt in early April and assembled on the island of Lemnos in Greece on 12 April, where a small garrison had been established in early March and practice landings were undertaken.[53] The British 29th Division departed for Mudros on 7 April and the Royal Naval Division rehearsed on the island of Skyros, after arriving there on 17 April.[55] That day, the British submarine HMS E15 tried to run the straits but hit a submarine net, ran aground and was shelled by a Ottoman fort, killing its commander, Lieutenant Commander Theodore S. Brodie and six of his crew; the survivors were forced to surrender.[56] The Entente fleet and British and French troops assembled at Mudros, ready for the landings but poor weather from 19 March grounded Entente aircraft for nine days and on 24 days only a partial programme of reconnaissance flights was possible.[57][58]
Ottoman preparations edit

The Ottoman force prepared to repel a landing on either side of the Straits was the 5th Army.[59] This force, which initially consisted of five divisions with another en route, was a conscript force, commanded by Otto Liman von Sanders.[28][60][61] Many of the senior officers in the 5th Army were also German.[62] Ottoman commanders and senior German officers debated the best means of defending the peninsula. All agreed that the best defence was to hold the high ground on the ridges of the peninsula. There was disagreement as to where the enemy would land and hence where to concentrate forces. Lieutenant Colonel Mustafa Kemal was familiar with the Gallipoli peninsula from his operations against Bulgaria in the Balkan Wars and forecast that Cape Helles (the southern tip of the peninsula) and Gaba Tepe were the likely areas for landing.[63][64]
Mustafa Kemal believed that the British would use their naval power to command the land from every side at the tip of the peninsula. At Gaba Tepe, the short distance to the eastern coast meant that the Entente could easily reach the Narrows, the right-angled bend in the middle of the Dardanelles.[65][66] Sanders considered Besika Bay on the Asiatic coast to be the most vulnerable to invasion, since the terrain was easier to cross and was convenient to attack the most important Ottoman batteries guarding the straits and a third of the 5th Army was assembled there.[67] Two divisions were concentrated at Bulair at the north end of the Gallipoli peninsula, to protect supply and communication lines to the defences further down the peninsula.[68] The 19th Division (Kemal) and the 9th Division were placed along the Aegean coast and at Cape Helles on the tip of the peninsula. Sanders kept the bulk of the Ottoman forces inland in reserve, leaving a minimum of troops guarding the coast.[69] The 3rd Division and a cavalry brigade arrived from Istanbul in early April, bringing the front line strength of the Ottomans to 60,000–62,077 men, which Sanders concentrated in three groups. A maximum effort to improve land and sea communications was ordered, to move reinforcements swiftly to danger points; troops moved at night to avoid Entente air reconnaissance. Sanders' strategy was opposed by Ottoman commanders, including Kemal, who believed that the defenders were too widely dispersed to defeat the invasion on the beaches.[70] Kemal thought Sander's classic strategy was suitable when there was strategic depth to the front, but Gallipoli did not offer that. His commander Esat Passa was not forceful enough in making the objection.[71][72] Sanders was certain that a rigid system of defence would fail and that the only hope of success lay in the mobility of the three groups, particularly the 19th Division near Boghali, in general reserve, ready to move to Bulair, Gaba Tepe or the Asiatic shore.[73]

The time needed by the British to organise the landings meant that Sanders, Colonel Hans Kannengiesser and other German officers, supported by Esat Pasha (III Corps) had more time to prepare their defences.[28] Sanders later noted, "the British allowed us four good weeks of respite for all this work before their great disembarkation ... This respite just sufficed for the most indispensable measures to be taken".[74] Roads were constructed, small boats built to carry troops and equipment across the Narrows, beaches were wired and improvised mines were constructed from torpedo warheads. Trenches and gun emplacements were dug along the beaches and troops went on route marches to avoid lethargy.[74] Kemal, whose 19th Division was vital to the defensive scheme, observed the beaches and awaited signs of an invasion from his post at Boghali, near Maidos.[75] The Ottomans created Ottoman Aviation Squadrons with German assistance and had four aircraft operating around Çanakkale in February, conducting reconnaissance and army co-operation sorties. From 11 April, an Ottoman aircraft made frequent flights over Mudros, keeping watch on the assembly of the British naval force and an airfield was established near Gallipoli.[57][76][28]
Landings edit
.jpg)
The Entente planned to land and secure the northern shore, capture the Ottoman forts and artillery batteries for a naval force to advance through the Narrows and the Sea of Marmara towards Istanbul.[77] Scheduled for 23 April but postponed until 25 April due to bad weather, landings were to be made at five beaches on the peninsula.[78] The 29th Division was to land at Helles on the tip of the peninsula and then advance upon the forts at Kilitbahir. The ANZACs, with the 3rd Australian Infantry Brigade spearheading the assault, were to land north of Gaba Tepe on the Aegean coast, from where they could advance across the peninsula, cut off the Ottoman troops in Kilitbahir and stop reinforcements from reaching Cape Helles.[79][80] This sector of the Gallipoli Peninsula became known as ANZAC; the area held by the British and French became known as the Helles sector or Helles. The French made a diversionary landing at Kum Kale on the Asian shore before re-embarking to hold the eastern area of the Helles sector. The Royal Naval Division simulated landing preparations at Bulair and a New Zealand officer, Bernard Freyberg, swam ashore under fire to light flares to distract the defenders from the real landings; Freyberg was later awarded the Distinguished Service Order.[81][82][83]
Arrangements for naval gunfire support to the landings had originally included bombarding the beaches and approaches but was changed to engagement of the ridges during the landings, with the beaches only to be shelled prior to the landings. No decision was ultimately made on the issue of close support and it was left to the initiative of ships' captains. A reluctance to approach the shore later affected the landings at "V" and "W" beach where some of the worst losses among the infantry occurred, while naval gunfire was of some assistance at "S", "X" and ANZAC.[84] Even then its effectiveness was limited by the initial confusion ashore, the broken terrain, thick vegetation and the lack of observation.[85] Kitchener had ruled that air requirements must be met by the Royal Naval Air Service (RNAS) and the Entente employed a small force of seaplanes and other aircraft from 3 Squadron, RNAS (Commander Charles Samson) which arrived at Tenedos at the end of March.[57] The aircraft were unopposed by the small Ottoman air force at first and during the planning, the force had been used to provide aerial reconnaissance, although this ultimately proved inadequate to meet the Entente' intelligence needs and make up for the lack of adequate maps.[86][51] After the landings, Entente aircraft conducted photographic reconnaissance, observed naval gunfire, reported on Ottoman troop movements and conducted a small number of bombing raids.[86]
ANZAC Cove edit

Allocated the northern landing, Birdwood's force included the 1st Australian Division (Major General William Bridges) and the New Zealand and Australian Division (Major General Sir Alexander Godley), about 25,000 men. The force was to land and advance inland to cut the lines of communication to the Ottoman forces in the south.[87][53] The 1st Australian Division would land first, with the 3rd Infantry Brigade leading as a covering force moving inland to establish positions on Gun Ridge. The 2nd Infantry Brigade was to follow and to capture the higher ground on Sari Bair. The 1st Infantry Brigade would land last as the divisional reserve. The New Zealand and Australian Division was to come ashore and form up to advance across the peninsula. The force was to assemble at night and land at dawn to surprise the defenders and on the evening of 24 April, the covering force embarked on battleships and destroyers, with the follow on forces in on transports. The troops would disembark from the transports into ships' boats and be towed close to the shore by steamboats and then row ashore.[53]
At around 2:00 a.m., an Ottoman observer on a hill at Ariburnu saw a multitude of ships far on the horizon. Captain Faik, in charge of a company from the 27th Infantry Regiment verified it with his binoculars and immediately informed his commanding officer, Ismet Bey, at Kabatepe. By 3:00 a.m., the moon was covered and the ships were no longer visible to the Ottomans.[88] The Ottomans were not sure if this was a real landing or a diversion. Once the intense artillery was heard, at around 6:00 a.m. the two remaining battalions of the 27th Infantry Regiment were ordered to make their way to Ariburnu urgently.[89] Sanders had left his HQ and was at Bulair, distracted by the few Entente ships that had appeared; he had been confident that this was where the landings would take place. For two days, he remained at Bulair with the 5th Division waiting for the real landing. His absence created problems in chain of command and delays in decision making which negated his defence scheme that relied on rapid movement of troops.[90]

At 4:00 a.m. on the morning of 25 April, the first wave of troops from the 3rd Brigade began moving towards the shore on lighters and ships' boats. The covering force landed approximately 1.2 mi (2 km) too far north, in a bay just south of Ari Burnu, due to undetected currents or a navigational error.[87][53] The landing was more difficult, over ground which rose steeply from the beaches, unlike the objective to the south, which was more open. The landing site was garrisoned by only two Ottoman companies but from positions on commanding ground, the Ottomans inflicted numerous casualties on the Australians before being overcome.[91] The broken terrain prevented a coordinated drive inland, with the Australians on unfamiliar ground and with inaccurate maps. In the maze of steep ravines, spurs and dense scrub, Australian parties that got forward quickly lost contact and were broken up into small groups. Some Australian troops reached the second ridge but fewer still reached their objectives and, having become dispersed, the covering force could provide little support to the follow-up force.[92]

The 1st and 2nd Brigades, then the New Zealand and Australian Division, landed on the beaches around Ari Burnu but became entangled, which took time to sort out.[93] About four hours after the landings began, the bulk of the 1st Australian Division was ashore safely and its leading elements were pushing inland. By mid-morning, Kemal had reorganised the defenders for a counter-attack on the commanding heights of Chunuk Bair and Sari Bair.[87] The right flank of the small lodgement taken by the Australians was driven in at 10:30 a.m., with most of 400 Plateau being lost. During the afternoon and evening, the left flank was pushed back from Baby 700 and the Nek. By evening, Bridges and Godley recommended re-embarkation; Birdwood agreed but, after receiving advice from the navy that re-embarkation was impossible, Hamilton ordered the troops to dig in instead. The Ottoman counter-attack was eventually repulsed and the Australians established a perimeter roughly from Walker's Ridge in the north to Shell Green in the south.[93][87] ANZAC casualties on the first day numbered around 2,000 men killed or wounded.[93] The failure to secure the high ground led to a tactical stalemate, with the landings contained by the defenders in a perimeter less than 1.2 mi (2 km) long.[87]
The Australian submarine HMAS AE2 (Lieutenant Commander Henry Stoker) penetrated the Straits on the night of 24/25 April. As landings began at Cape Helles and ANZAC Cove at dawn on 25 April, AE2 reached Chanak by 6:00 a.m. and torpedoed an Ottoman gunboat believed to be a Peyk-i Şevket-class cruiser then evaded a destroyer.[94][95] The submarine ran aground beneath a Ottoman fort but the Ottoman gunners could not bring their guns to bear and AE2 was manoeuvred free.[94] Shortly after refloating, the periscope was sighted by a Ottoman battleship firing over the peninsula at Entente landing sites and the ship ceased fire and withdrew.[94] AE2 advanced toward the Sea of Marmara and, at 08:30, Stoker decided to rest the boat on the seabed until nightfall.[94] At around 9:00 p.m., AE2 surfaced to recharge batteries and sent a wireless report to the fleet.[94][96] The landing at Cape Helles was going well but the landing at Anzac Cove was not as successful and the Anzac commander, Lieutenant General Sir William Birdwood, contemplated the re-embarkation of his troops.[94] The success of AE2 was a consideration in Birdwood deciding to persist and reports about AE2 were relayed to the soldiers ashore to improve morale.[94] Stoker was ordered to "generally run amok" and, with no enemies in sight, he sailed into the Sea of Marmara, where AE2 cruised for five days to give the impression of greater numbers and made several attacks against Ottoman ships, which failed because of mechanical problems with the torpedoes.[97]
Cape Helles edit

The Helles landing was made by the 29th Division (Major General Aylmer Hunter-Weston). The division landed on five beaches in an arc about the tip of the peninsula, named "S", "V", "W"', "X" and "Y" Beaches from east to west.[98] On 1 May, the 29th Indian Brigade (including 1/6th Gurkha Rifles) landed, took and secured Sari Bair above the landing beaches and was joined by 1/5th Gurkha Rifles and 2/10th Gurkha Rifles; the Zion Mule Corps landed at Helles on 27 April.[99] At "Y" Beach, during the first engagement, the First Battle of Krithia, the Entente landed unopposed and advanced inland.[100] There were only a small number of defenders in the village but, lacking orders to exploit the position, the "Y" Beach commander withdrew his force to the beach. It was as close as the Entente ever came to capturing the village as the Ottomans brought up a battalion of the 25th Regiment, checking any further movement.[101]

The main landings were made at "V" Beach, beneath the old Seddülbahir fortress, and at "W" Beach, a short distance to the west on the other side of the Helles headland. The covering force of Royal Munster Fusiliers and Hampshires landed from a converted collier, SS River Clyde, which was run aground beneath the fortress so that the troops could disembark along ramps. The Royal Dublin Fusiliers landed at "V" Beach and the Lancashire Fusiliers at "W" Beach in open boats, on a shore overlooked by dunes and obstructed with barbed wire. On both beaches, the Ottoman defenders occupied good defensive positions and inflicted many casualties on the British infantry as they landed. Troops emerging one by one from sally ports on River Clyde were shot by machine-gunners at the Seddülbahir fort and, of the first 200 soldiers to disembark, 21 men reached the beach.[102]
The Ottoman defenders were too few to defeat the landing but inflicted many casualties and contained the attack close to the shore. By the morning of 25 April, out of ammunition and with nothing but bayonets to meet the attackers on the slopes leading up from the beach to the heights of Chunuk Bair, the 57th Infantry Regiment received orders from Kemal: "I do not order you to fight, I order you to die. In the time which passes until we die, other troops and commanders can come forward and take our places". Every man of the regiment was either killed or wounded.[103][b]
At "W" Beach, thereafter known as Lancashire Landing, the Lancashires were able to overwhelm the defenders despite the loss of 600 casualties from 1,000 men. Six awards of the Victoria Cross were made among the Lancashires at "W" Beach. A further six Victoria Crosses were awarded among the infantry and sailors at the "V" Beach landing and three more were awarded the following day as they fought their way inland. Five squads of Ottoman infantry led by Sergeant Yahya distinguished themselves by repulsing several attacks on their hilltop position, the defenders eventually disengaging under cover of darkness.[104] After the landings, so few men remained from the Dublin and Munster Fusiliers that they were amalgamated into The Dubsters.[105] Only one Dubliner officer survived the landing while, of the 1,012 Dubliners who landed, just 11 survived the Gallipoli campaign unscathed.[106][107] After the landings, little was done by the Entente to exploit the situation, apart from a few limited advances inland by small groups of men. The Entente attack lost momentum and the Ottomans had time to bring up reinforcements and rally the small number of defending troops.[108]
Land campaign edit
Early battles edit

On the afternoon of 27 April, the 19th Division, reinforced by six battalions from the 5th Division, counter-attacked the six Entente brigades at Anzac.[109] With the support of naval gunfire, the Entente held back the Ottomans throughout the night. The following day the British were joined by French troops transferred from Kum Kale on the Asiatic shore to the right of the line near 'S' Beach at Morto Bay. On 28 April, the Entente fought the First Battle of Krithia to capture the village.[110] Hunter-Weston made a plan which proved overly complex and was poorly communicated to the commanders in the field. The troops of the 29th Division were still exhausted and unnerved by the battles for the beaches and for Seddülbahir village, which was captured after much fighting on 26 April. The Ottoman defenders stopped the Entente advance halfway between the Helles headland and Krithia around 6:00 p.m., having inflicted 3,000 casualties.[111]
As Ottoman reinforcements arrived, the possibility of a swift Entente victory on the peninsula disappeared and the fighting at Helles and Anzac became a battle of attrition. On 30 April, the Royal Naval Division (Major General Archibald Paris) landed. The same day, Kemal, believing that the Entente were on the verge of defeat, began moving troops forward through Wire Gulley, near the 400 Plateau and Lone Pine. Eight battalions of reinforcements were dispatched from Istanbul a day later and that afternoon, Ottoman troops counter-attacked at Helles and Anzac. The Ottomans briefly broke through in the French sector but the attacks were repulsed by massed Entente machine-gun fire, which inflicted many casualties on the attackers.[112] The following night, Birdwood ordered the New Zealand and Australian Division to attack from Russell's Top and Quinn's Post towards Baby 700. The Australian 4th Infantry Brigade (Colonel John Monash), the New Zealand Infantry Brigade and Royal Marines from the Chatham Battalion took part in the attack. Covered by a naval and artillery barrage, the troops advanced a short distance during the night but got separated in the dark. The attackers came under massed small-arms fire from their exposed left flank and were repulsed, having suffered about 1,000 casualties.[113]
.jpg)
On 30 April, the submarine AE2 began to rise uncontrollably and surfaced near the Sultanhisar, then dropped precipitously below the safe diving depth, then broke the surface again at the stern.[97] Sultanhisar immediately fired on the submarine, puncturing the pressure hull. Stoker ordered the company to abandon ship, scuttled the submarine and the crew was taken prisoner. AE2's achievements showed that it was possible to force the Straits and soon Ottoman communications were badly disrupted by British and French submarine operations.[97] On 27 April, HMS E14 (Lieutenant Commander Edward Boyle), entered the Sea of Marmara on a three-week patrol, which became one of the most successful Entente naval actions of the campaign, in which four ships were sunk, including the transport Gul Djemal which was carrying 6,000 troops and a field battery to Gallipoli. While the quantity and value of the shipping sunk was minor, the effect on Ottoman communications and morale was significant; Boyle was awarded the Victoria Cross.[114][115] Following the success of AE2 and E14, the French submarine Joule attempted the passage on 1 May but struck a mine and was lost with all hands.[116] (Several weeks earlier another French boat, Saphir, had been lost after running aground near Nagara Point.)[117]
Operations: May 1915 edit
On 5 May, the 42nd (East Lancashire) Division was dispatched from Egypt.[118] Believing Anzac to be secure, Hamilton moved the Australian 2nd Infantry Brigade and the New Zealand Infantry Brigade, along with 20 Australian field guns, to the Helles front as reserves for the Second Battle of Krithia.[119] Involving a force of 20,000 men, it was the first general attack at Helles and was planned for daylight. French troops were to capture Kereves Dere and the British, Australians and New Zealanders were assigned Krithia and Achi Baba. After 30 minutes of artillery preparation, the assault began at mid-morning on 6 May.[120] The British and French advanced along the Gully, Fir Tree, Krithia and Kereves spurs which were separated by deep gullies, fortified by the Ottomans. As the attackers advanced, they became separated when trying to outflank Ottoman strong points and found themselves in unfamiliar terrain. Under artillery and then machine-gun fire from Ottoman outposts that had not been spotted by British aerial reconnaissance, the attack was stopped; next day, reinforcements resumed the advance.[121]

The attack continued on 7 May and four battalions of New Zealanders attacked up Krithia Spur on 8 May; with the 29th Division the attackers managed to reach a position just south of the village. Late in the afternoon, the Australian 2nd Brigade advanced quickly over open ground to the British front line. Amidst small arms and artillery-fire, the brigade charged towards Krithia and gained 600 m (660 yd), about 400 m (440 yd) short of the objective, with 1,000 casualties. Near Fir Tree Spur, the New Zealanders managed to get forward and link up with the Australians, although the British were held up and the French were exhausted, despite having occupied a point overlooking their objective. The attack was suspended and the Entente dug in, having failed to take Krithia or Achi Baba.[121]
A brief period of consolidation followed; the Entente had almost run out of ammunition, particularly for the artillery and both sides consolidated their defences.[122] The Ottomans relieved troops opposite the Australian line, which was reinforced by the Australian Light Horse operating as infantry.[123] Sporadic fighting continued, with sniping, grenade attacks and raids, the opposing trenches separated in places by only a few metres.[124][123] The Australians lost a number of officers to sniping, including the commander of the 1st Division, Major General William Bridges, who was wounded while inspecting a 1st Light Horse Regiment position near "Steele's Post" and died of his injuries on the hospital ship HMHS Gascon on 18 May.[125]
At the end of April Birdwood told GHQ MEF (General Headquarters Mediterranean Expeditionary Force) that he could not land 6,000 horses at Anzac Cove as there was no water for them. GHQ MEF was unhappy that the ANZAC force would be immobilised on the beachhead, but they would have been no use. Some of the thousands of men and horses remained on board ship for up to a month. Birdwood signalled on 17 May that 17 transports would be returning to Alexandria to offload 5,251 horses accompanied by 3,217 men. GHQ MEF insisted that some of the men remain in Alexandria to look after the horses and guard ANZACs "many vehicles and mountains of baggage".[126]
Ottoman counter-offensive: 19 May edit
On 19 May, 42,000 Ottoman troops launched an attack at Anzac to push the 17,000 Australians and New Zealanders back into the sea.[86][127] Short of artillery and ammunition, the Ottomans intended to rely on surprise and weight of numbers but on 18 May, the crews of a flight of British aircraft spotted the Ottoman preparations.[86][127] The Ottomans suffered c. 13,000 casualties in the attack, of which 3,000 men were killed; Australian and New Zealand casualties were 160 killed and 468 wounded.[127][128][129] The dead included a stretcher bearer, John Simpson Kirkpatrick, whose efforts to evacuate wounded men on a donkey while under fire became famous amongst the Australians at Anzac; afterwards, his story became part of the Australian narrative of the campaign.[130] Ottoman losses were so severe that a truce was organised by Aubrey Herbert and others on 24 May, to bury the dead lying in no man's land, which led to a camaraderie between the armies, much like the Christmas truce of 1914 on the Western Front.[131]

A witness account from Private Victor Laidlaw of the Australian 2nd Field Ambulance described the day,
The armistice was declared from 8:30 a.m. this morning till 4:30 p.m. it is wonderful, things are unnaturally quiet and I felt like getting up and making a row myself, the rifle fire is quiet, no shell fire. The stench round the trenches where the dead had been lying for weeks was awful, some of the bodies were mere skeletons, it seems so very different to see each side near each other's trenches burying their dead, each man taking part in the ceremonies is called a pioneer and wears 2 white bands on his arms, everybody is taking advantage of the armistice to do anything they want to do out of cover and a large number are down bathing and you would think today was Cup Day down at one of our seaside beaches.[132]
The truce was not repeated formally.[131]

The British advantage in naval artillery diminished after the battleship HMS Goliath was torpedoed and sunk on 13 May by the Muâvenet-i Millîye, killing 570 men out of a crew of 750, including the ship's commander, Captain Thomas Shelford.[133] A German submarine, U-21, sank HMS Triumph on 25 May and HMS Majestic on 27 May.[134] More British reconnaissance patrols were flown around Gallipoli and U-21 was forced to leave the area but ignorant of this, the Entente withdrew most of their warships to Imbros, where they were "protectively tethered" between sorties, which greatly reduced Entente naval firepower, particularly in the Helles sector.[135] The submarine HMS E11 (Lieutenant Commander Martin Nasmith, later awarded a Victoria Cross) passed through the Dardanelles on 18 May and sank or disabled eleven ships, including three on 23 May, before entering Constantinople Harbour, firing on a transport alongside the arsenal, sinking a gunboat and damaging the wharf.[136][137][138]
The Ottoman forces lacked artillery ammunition and field batteries were only able to fire c. 18,000 shells between early May and the first week of June.[139] After the defeat of the counter-attack at Anzac in mid-May, the Ottoman forces ceased frontal assaults. Late in the month, the Ottomans began tunneling around Quinn's Post in the Anzac sector and early in the morning of 29 May, despite Australian counter-mining, detonated a mine and attacked with a battalion from the 14th Regiment. The Australian 15th Battalion was forced back but counter-attacked and recaptured the ground later in the day, before being relieved by New Zealand troops. Operations at Anzac in early June returned to consolidation, minor engagements and skirmishing with grenades and sniper-fire.[140]
Operations: June–July 1915 edit

In the Helles sector, which had been extensively entrenched by both sides, the Entente attacked Krithia and Achi Baba again, in the Third Battle of Krithia on 4 June, with the 29th Division, Royal Naval Division, 42nd Division and two French divisions.[141] The attack was repulsed and with it, the possibility of a decisive breakthrough ended; trench warfare resumed, with objectives being measured in hundreds of yards. Casualties were approximately 25 percent on both sides; the British lost 4,500 from 20,000 men and the French 2,000 casualties from 10,000 troops. Ottoman losses were 9,000 casualties according to the Ottoman Official History and 10,000 according to another account.[142]

In June, the seaplane carrier HMS Ben-my-Chree arrived and the Entente air effort increased from a squadron to No. 3 Wing RNAS.[143] The 52nd (Lowland) Division also landed at Helles in preparation for the Battle of Gully Ravine, which began on 28 June and achieved a local success, which advanced the British line along the left (Aegean) flank of the battlefield. Sanders credited the defence to two Ottoman officers, Faik Pasa and Albay Refet.[139] On 30 June, the French commander, Henri Gouraud who had earlier replaced Albert d'Amade, was wounded and replaced by his divisional commander, Maurice Bailloud.[144] Between 1 and 5 July, the Ottomans counter-attacked the new British line several times but failed to regain the lost ground. Ottoman casualties for the period were estimated at 14,000 men.[145] On 12 July, two fresh brigades from the 52nd Division attacked at the centre of the line along Achi Baba Nullah (Bloody Valley), gained very little ground and lost 2,500 casualties out of 7,500 men; the Royal Naval Division had 600 casualties and French losses were 800 men. Ottoman losses were about 9,000 casualties and 600 prisoners.[146]
At sea, the submarine E14 made two voyages into the Marmara.[136] The third tour began on 21 July, when E14 passed through the straits despite a new anti-submarine net placed near the Narrows.[147] The next attempt was made by Mariotte on 27 July, which was caught in the net, forced to the surface and bombarded by shore batteries; Mariotte was scuttled.[148] On 8 August, E11 torpedoed the battleship Barbaros Hayreddin with the loss of 253 men and sank a gunboat, seven transports and 23 sailing vessels.[149][150][151]
August offensive edit

The failure of the Entente to capture Krithia or make any progress on the Helles front led Hamilton to form a new plan to secure the Sari Bair Range of hills at the Battle of Sari Bair and capture high ground on Hill 971 in the Battle of Chunuk Bair.[152] Both sides had been reinforced, the original five Entente divisions having been increased to fifteen and first six Ottoman divisions to sixteen.[153][154] The Entente planned to land two fresh infantry divisions from IX Corps at Suvla, 5 mi (8.0 km) north of Anzac, followed by an advance on Sari Bair from the north-west.[155][156] At Anzac, an offensive would be made against the Sari Bair range by advancing through rough and thinly defended terrain, north of the Anzac perimeter. This would be achieved by an attack on Baby 700 from the Nek by dismounted Australian light horsemen from the 3rd Light Horse Brigade, in concert with an attack on Chunuk Bair summit by New Zealanders from the New Zealand Infantry Brigade, who would traverse Rhododendron Ridge, the Apex and the Farm. Hill 971 would be attacked by Gurkhas of the 29th Indian Brigade and the Australians of the 4th Infantry Brigade.[156] The Entente had 40 aircraft, mainly from 3 Wing RNAS at Imbros, which had replaced its Voisins with Farmans and Nieuport Xs; Escadrille MF98T had also been established at Tenedos.[157] The Ottomans had 20 aircraft, of which eight were stationed at Çanakkale. Entente aircraft made reconnaissance flights, spotted for naval guns and conducted low-level bombing of Ottoman reserves as they were brought up to the battlefield.[143] Entente aircraft also undertook anti-shipping operations in the Gulf of Saros, where a seaplane from HMS Ben-my-Chree sank an Ottoman tug with an air-launched torpedo.[158]

The landing at Suvla Bay took place on the night of 6 August against light opposition; the British commander, Lieutenant General Frederick Stopford, had limited his early objectives and then failed to forcefully push his demands for an advance inland and little more than the beach was seized. The Ottomans were able to occupy the Anafarta Hills, preventing the British from penetrating inland, which contained the landings and reduced the Suvla front to static trench warfare.[159] The offensive was preceded on the evening of 6 August by diversions, at Helles, where the Battle of Krithia Vineyard became another costly stalemate. At Anzac, the diversionary Battle of Lone Pine, led by the Australian 1st Infantry Brigade, captured the main Ottoman trench line and diverted Ottoman forces but the attacks at Chunuk Bair and Hill 971 failed.[79][160][161]
.jpg)
The New Zealand Infantry Brigade came within 500 m (550 yd) of the near peak of Chunuk Bair by dawn on 7 August but was not able to seize the summit until the following morning.[162] On the morning of 7 August, the Australian 3rd Light Horse Brigade attacked on a narrow front at the Nek, to coincide with the New Zealand attack from Chunuk Bair against the rear of the Ottoman defences. The opening artillery barrage lifted seven minutes too soon, which alerted the Ottomans and the attack was a costly failure.[163] An attack on Hill 971 never took place after the Australian 4th Infantry Brigade and an Indian brigade lost direction during the night. Attempts to resume the attack were easily repulsed by the Ottoman defenders, at great cost to the Entente.[164] The New Zealanders held out on Chunuk Bair for two days before being relieved by two New Army battalions from the Wiltshire and Loyal North Lancashire Regiments but an Ottoman counterattack on 10 August, led by Mustafa Kemal, swept them from the heights.[162] Of 760 men in the New Zealand Wellington Battalion who reached the summit, 711 became casualties.[165] With the Ottoman recapture of the ground, the Entente' best chance of victory was lost.[164]
The Suvla landing was reinforced by the arrival of the 10th (Irish) Division on 7 August, the 53rd (Welsh) Division, which began landing on 8 August, the 54th (East Anglian) Division arriving late on 10 August and the dismounted yeomanry of the 2nd Mounted Division on 18 August.[166] On 12 August, the 54th Division attacked Kavak Tepe and Tekke Tepe, crossing the Anafarta Plain. The attack failed and Hamilton briefly considered the evacuation of Suvla and Anzac.[167][c]

Elements of the new Australian 2nd Division began arriving at Anzac from Egypt with the 5th Infantry Brigade landing from 19–20 August and the 6th Brigade and 7th Brigade arriving in early September.[168][169] The 29th Division was also shifted from Helles to Suvla. The final British attempt to resuscitate the offensive came on 21 August, in the Battle of Scimitar Hill and the Battle of Hill 60. Control of the hills would have united the Anzac and Suvla fronts but the attacks failed. On 17 August, Hamilton had requested another 95,000 troops but a day earlier, the French had announced plans to Kitchener for an autumn offensive in France. A meeting of the Dardanelles Committee on 20 August determined that the French offensive would be supported by a maximum effort, which left only about 25,000 reinforcements for the Dardanelles. On 23 August, after news of the failure at Scimitar Hill, Hamilton went onto the defensive, as the Bulgarian entry into the war, which would allow the Germans to rearm the Ottoman army, was imminent and left little opportunity for the resumption of offensive operations. On 20 September 1915, the Newfoundland Regiment was deployed at Suvla Bay with the 29th Division.[170] On 25 September, Kitchener proposed detaching two British and one French division for service in Salonika in Greece, which was the beginning of the end of the Entente campaign at Gallipoli. Instead, a counter proposal from Sir Ian Hamilton was agreed to; only the 10th (Irish) Division and the 156th Infantry Division (France) were withdrawn from the peninsula. By the end of September these troops were concentrating at Mudros for conveyance to the new front.[171]
Alan Moorehead wrote that during the stalemate, an old Ottoman batman was regularly permitted to hang his platoon's washing on the barbed wire undisturbed and that there was a "constant traffic" of gifts being thrown across no-man's land, dates and sweets from the Ottoman side and cans of beef and packs of cigarettes from the Entente side.[172] Conditions at Gallipoli grew worse for everyone as summer heat and poor sanitation resulted in an explosion in the fly population. Eating became extremely difficult as unburied corpses became bloated and putrid. The precarious Entente lodgements were poorly situated, which caused supply and shelter problems. A dysentery epidemic spread through the Entente trenches at Anzac and Helles, while the Ottomans also suffered heavily from disease which resulted in many deaths.[173]
Evacuation edit
After the failure of the August Offensive, the Gallipoli campaign drifted. Ottoman success began to affect public opinion in Britain, with criticism of Hamilton's performance being smuggled out by Keith Murdoch, Ellis Ashmead-Bartlett and other reporters.[174] Stopford and other dissident officers also contributed to the air of gloom and the possibility of evacuation was raised on 11 October 1915. Hamilton resisted the suggestion, fearing the damage to British prestige but was sacked shortly afterwards and replaced by Lieutenant General Sir Charles Monro.[175] Autumn and winter brought relief from the heat but also led to gales, blizzards and flooding, resulting in men drowning and freezing to death, while thousands suffered frostbite.[176] The Serbian defeat in the Serbian campaign in autumn 1915 prompted France and Britain to transfer troops from the Gallipoli campaign to Greek Macedonia; the Macedonian front was established to support the remnants of the Serbian army to conquer Vardar Macedonia.[177]

On 4 September, the submarine HMS E7 was caught in the Ottoman anti-submarine net as it began another tour.[178] Despite such reverses, by mid-September, Entente nets and mines had closed the eastern entrance to the Dardanelles to German U-boats and U-21 was thwarted when it tried to pass the straits to Istanbul on 13 September.[179] The first French submarine to enter the Sea of Marmara was Turquoise but it was forced to turn back; on 30 October, when returning through the straits, it ran aground beneath a fort and was captured intact. The crew of 25 were taken prisoner and documents detailing planned Entente operations were discovered, including a scheduled rendezvous with HMS E20 on 6 November. The rendezvous was kept by the German U-boat U-14 instead, which torpedoed and sank E20, killing all but nine of the crew.[180]
The situation at Gallipoli was complicated by Bulgaria joining the Central Powers. In early October 1915, the British and French opened a second Mediterranean front at Salonika, by moving two divisions from Gallipoli and reducing the flow of reinforcements.[181] A land route between Germany and the Ottoman Empire through Bulgaria was opened and the Germans rearmed the Ottomans with heavy artillery capable of devastating Entente trenches, especially on the confined front at Anzac, modern aircraft and experienced crews.[182][183] In late November, an Ottoman crew in a German Albatros C.I shot down a French aircraft over Gaba Tepe and the Austro-Hungarian 36. Haubitzbatterie and 9. Motormörserbatterie artillery units arrived, providing a substantial reinforcement of the Ottoman artillery.[183][2][184] Monro recommended evacuation to Kitchener, who in early November visited the eastern Mediterranean.[174] After consulting with the commanders of VIII Corps at Helles, IX Corps at Suvla and Anzac, Kitchener agreed with Monro and passed his recommendation to the British Cabinet, who confirmed the decision to evacuate in early December.[185]
Due to the narrowness of no man's land and the winter weather, many casualties were anticipated during the embarkation. The untenable nature of the Entente position was made apparent by a rainstorm on 26 November 1915. The downpour at Suvla lasted for three days and there was a blizzard in early December. Rain flooded trenches, drowned soldiers and washed unburied corpses into the lines; the following snow killed still more men from exposure.[186] Suvla and Anzac were to be evacuated in late December, the last troops leaving before dawn on 20 December. Troop numbers had been slowly reduced since 7 December and ruses, such as William Scurry's self-firing rifle, which had been rigged to fire by water dripped into a pan attached to the trigger, were used to disguise the Entente departure.[187] At Anzac Cove, troops maintained silence for an hour or more, until curious Ottoman troops ventured to inspect the trenches, whereupon the Anzacs opened fire. This incident successfully discouraged the Ottomans from inspecting when the actual evacuation occurred. A mine was detonated at the Nek, which killed 70 Ottoman soldiers.[188] The Entente force was embarked, with the Australians suffering no casualties on the final night but large quantities of supplies and stores fell into Ottoman hands.[189][190][191]

Helles was retained for a period but a decision to evacuate the garrison was made on 28 December.[192] Unlike the evacuation from Anzac Cove, Ottoman forces were looking for signs of withdrawal.[190] Having used the interval to bring up reinforcements and supplies, Sanders mounted an attack on the British at Gully Spur on 7 January 1916 with infantry and artillery but the attack was a costly failure.[193] Mines were laid with time fuzes and that night and on the night of 7/8 January, under the cover of a naval bombardment, the British troops began to fall back 5 mi (8.0 km) from their lines to the beaches, where makeshift piers were used to board boats.[190][194] The last British troops departed from Lancashire Landing around 04:00 on 8 January 1916.[193] The Newfoundland Regiment was part of the rearguard and withdrew on 9 January 1916.[195] Among the first to land, remnants of The Plymouth Battalion, Royal Marine Light Infantry were the last to leave the Peninsula.[196]
Despite predictions of up to 30,000 casualties, 35,268 troops, 3,689 horses and mules, 127 guns, 328 vehicles and 1,600 long tons (1,600 t) of equipment were removed;[194] 508 mules that could not be embarked were killed so as not to fall into Ottoman hands and 1,590 vehicles were left behind with smashed wheels.[197] As at Anzac, large amounts of supplies (including 15 British and six French unserviceable artillery pieces which were destroyed), gun carriages and ammunition were left behind; hundreds of horses were slaughtered to deny them to the Ottomans. A sailor was killed by debris from a magazine that exploded prematurely and a lighter and a picket boat were lost.[198] Shortly after dawn, the Ottomans retook Helles.[193] In the final days of the campaign, Ottoman air defences had been increased by a German–Ottoman fighter squadron, which began operations over the peninsula and inflicted the first British flying losses a couple of days after the evacuation of Helles, when three Fokker Eindeckers shot down two RNAS aircraft.[183]
Aftermath edit
Military repercussions edit
.jpg)
Harvey Broadbent described the campaign as "a close-fought affair" that was a defeat for the Entente, while Les Carlyon called it a stalemate.[199] Peter Hart wrote that the Ottoman forces "held the Entente back from their real objectives with relative ease" and Philip Haythornthwaite wrote of it as a "disaster for the Entente".[190] The campaign caused "enormous damage to ... [Ottoman] national resources" and at that stage of the war the Entente were in a better position to replace their losses than the Ottomans but the Entente attempt at securing a passage through the Dardanelles failed.[200] The campaign diverted Ottoman forces away from other areas of conflict in the Middle East, but it also consumed resources the Entente could have employed on the Western Front and caused them many losses.[201]
The Entente campaign was plagued by ill-defined goals, poor planning, insufficient artillery, inexperienced troops, inaccurate maps, poor intelligence, overconfidence, inadequate equipment, supply and tactical deficiencies.[202][203] The Entente forces possessed inaccurate maps and intelligence and proved unable to exploit the terrain to their advantage; the Ottoman commanders were able to use the high ground around the Entente landing beaches for positions that limited the ability of Entente forces to penetrate inland, confining them to narrow beaches.[51] The campaign's necessity remains the subject of debate and the recriminations that followed were significant, highlighting the schism that had developed between military strategists who felt the Entente should focus on fighting on the Western Front and those who favoured trying to end the war by attacking Germany's "soft underbelly", its allies in the east.[79][204]
British and French submarine operations in the Sea of Marmara were the one significant area of success of the Gallipoli campaign, forcing the Ottomans to abandon the sea as a transport route. Between April and December 1915, nine British and four French submarines carried out 15 patrols, sinking one battleship, one destroyer, five gunboats, 11 troop transports, 44 supply ships and 148 sailing vessels at a cost of eight Entente submarines sunk in the strait or in the Sea of Marmara.[205] During the campaign there was always one British submarine in the Sea of Marmara, sometimes two; in October 1915, there were four Entente submarines in the region.[117] E2 left the Sea of Marmara on 2 January 1916, the last British submarine in the sea. Four E-class and five B-class submarines remained in the Mediterranean following the evacuation of Helles.[206] By this time the Ottoman navy had been all but forced to cease operations in the area, while merchant shipping had also been significantly curtailed. The official German naval historian, Admiral Eberhard von Mantey, later concluded that had the sea-lanes of communication been completely severed, the Ottoman 5th Army would likely have faced catastrophe. As it was these operations were a source of anxiety, posing a constant threat to shipping and causing many losses, dislocating Ottoman attempts to reinforce their forces at Gallipoli and shelling troop concentrations and railways.[207]
Gallipoli marked the end for Hamilton and Stopford but Hunter-Weston went on to lead VIII Corps on the first day of the Battle of the Somme.[208][209] The competence of Australian brigade commanders, John Monash (4th Infantry Brigade) and Harry Chauvel (1st Light Horse Brigade, New Zealand and Australian Division), was recognised by promotion to divisional and corps command.[210][211] The influence of Kitchener waned after the coalition government was formed in May 1915, partly because of the growing sense of failure in the Dardanelles and culminated in Kitchener being over-ruled on support for the French at Salonika in early December 1915, when his influence on the Cabinet was at its lowest.[212] The campaign gave confidence to the Ottomans in their ability to defeat the Entente.[203] In Mesopotamia, the Ottomans surrounded a British expedition at Kut Al Amara, forcing their surrender in April 1916.[213] Ottoman forces in southern Palestine were poised to launch an attack against the Suez Canal and Egypt.[214] Defeat at the Battle of Romani and lack of the materials to complete the military railway necessary for such an operation, marked the end of that ambition.[215] The optimism gained from the victory at Gallipoli was replaced by a gathering sense of despair and the British remained on the offensive in the Middle East for the rest of the war.[216][217]

The lessons of the campaign were studied by military planners prior to amphibious operations such as the Normandy Landings in 1944 and during the Falklands War in 1982.[218][46] The lessons of the campaign influenced US Marine Corps amphibious operations during the Pacific War and continue to influence US amphibious doctrine.[218][219] In 1996, Theodore Gatchel wrote that between the wars, the campaign "became a focal point for the study of amphibious warfare" in Britain and United States.[219] In 2008, Glenn Wahlert wrote that Gallipoli involved "all four types of amphibious operations: the raid, demonstration, assault and withdrawal".[218]
Russell Weigley wrote that analysis of the campaign before the Second World War led to "a belief among most of the armed forces of the world" that amphibious assaults could not succeed against modern defences and that despite landings in Italy, Tarawa and the Gilberts, arguably this perception continued until Normandy in June 1944.[220] Hart wrote that despite the pessimistic analyses after 1918, the situation after 1940 meant that landings from the sea were unavoidable and it was only after Normandy that the belief that opposed landings were futile was overcome.[221] The memory of Gallipoli weighed upon the Australians during the planning of the Huon Peninsula campaign in late 1943. In September, the Australians made their first opposed amphibious landing since Gallipoli at the Battle of Finschhafen in New Guinea.[222] The landing was hampered by navigational errors and troops came ashore on the wrong beaches but they had been trained according to the lessons of Gallipoli and quickly reorganised to push inland.[223]
Political effects edit
Political repercussions in Britain had begun during the battle; Fisher resigned in May after bitter conflict with Churchill. The crisis that followed after the Conservatives learned that Churchill would be staying, forced the Prime Minister H. H. Asquith to end his Liberal Government and form a Coalition Government with the Conservative Party.[224] The Asquith government responded to the disappointment and outrage over Gallipoli and Kut by establishing commissions of inquiry into both episodes, which had done much to "destroy its faltering reputation for competence".[225] The Dardanelles Commission was set up to investigate the failure of the expedition, the first report being issued in 1917, with the final report published in 1919.[62] Following the failure of the Dardanelles expedition, Sir Ian Hamilton, commander of the MEF, was recalled to London in October 1915, ending his military career.[226] Churchill was demoted from First Lord of the Admiralty as a condition of Conservative entry to the coalition but remained in the Cabinet in the sinecure of Chancellor of the Duchy of Lancaster.[227] Churchill resigned in November 1915 and left London for the Western Front, where he commanded an infantry battalion of the Royal Scots Fusiliers early in 1916.[227][228]
Asquith was partly blamed for Gallipoli and other disasters and was overthrown in December 1916, when David Lloyd George proposed a war council under his authority, with the Conservatives in the coalition threatening to resign unless the plan was implemented. After failure to reach agreement, Lloyd George and then Asquith resigned, followed by Lloyd George becoming Prime Minister.[229] Lloyd George formed a new government, from which Churchill, active again in the House of Commons from June 1916, was excluded because of Conservative opposition. In the summer of 1917, Churchill was eventually appointed to the cabinet-level post of Minister of Munitions but not to the War Cabinet.[227] The final report of the Commission was issued in 1919, concluding that with the forces available, success was dependent on the government giving priority to the expedition and leaving the British Expeditionary Force in France to make do. The Commissioners found that Hamilton had been over-optimistic from the beginning and had added to Stopford's difficulties on 8 August 1915. Hamilton emerged from the investigation more favourably than perhaps was justified, partly because he made devious attempts to gain collusion from witnesses and obtain leaks from the deliberations of the Commission; Hamilton was never given another army appointment.[230][d]
Casualties edit
| Countries | Dead | Wounded | Missing or POW |
Total |
|---|---|---|---|---|
| Ottoman Empire |
56,643 | 97,007 | 11,178 | 164,828 |
| United Kingdom | 34,072 | 78,520 | 7,654 | 120,246 |
| France | 9,798 | 17,371 | — | 27,169 |
| Australia | 8,709 | 19,441 | — | 28,150 |
| New Zealand | 2,721 | 4,752 | — | 7,473 |
| British India | 1,358 | 3,421 | — | 4,779 |
| Newfoundland | 49 | 93 | — | 142 |
| Total (Entente) | 56,707 | 123,598 | 7,654 | 187,959 |
Casualty figures for the campaign vary between sources but in 2001, Edward J. Erickson wrote that in the Gallipoli Campaign over 100,000 men were killed, including 56,000–68,000 Ottoman and around 53,000 British and French soldiers.[6] Using the Ottoman Archives, Erickson estimated that Ottoman casualties in the Gallipoli Campaign were 56,643 men died from all causes, 97,007 troops were wounded or injured and 11,178 men went missing or were captured.[11] In 2001, Les Carlyon gave figures of 43,000 British killed or missing, including 8,709 Australians.[237] In September 1915 Godley complained that too few of the recovered sick or wounded casualties from Gallipoli were being returned from Egypt, and General John Maxwell replied that "the appetite of the Dardanelles for men has been phenomenal and wicked".[238]
There were nearly 500,000 casualties during the campaign, with the British History of the Great War listing losses including sick as 205,000 British, 47,000 French and 251,000 Ottoman troops (with some Turkish (sic) sources referring to 350,000 casualties.)[233] Ottoman casualties have been disputed and in 2001, Tim Travers gave casualty figures of 2,160 officers and 287,000 other ranks (battle and non-battle); included among this may be 87,000 killed.[239][14] Liman von Sanders estimated that the Ottomans suffered 218,000 casualties, including 66,000 dead and that 42,000 wounded returned to duty.[6]
The New Zealand semi-official history (1919, by Fred Waite) estimated that 8,556 New Zealanders served at Gallipoli and contained an estimate of 251,000 Ottoman battle casualties including 86,692 dead.[232] In 2000, Ross McGibbon wrote that 2,721 New Zealanders had been killed, about a quarter of those who had initially landed on the peninsula; other estimates were 2,701 (Pugsley) or 2,779 (Stowers).[14][240] A 2019 study by the New Zealand historians John Crawford and Matthew Buck arrived at a higher estimate for the numbers of New Zealand soldiers who served at Gallipoli, over 16,000, perhaps 17,000 (rather than earlier revised figures of 13,000 to 14,000 and the 1919 figure of 8,556).[241]
Sickness edit
Many soldiers became sick due to insanitary conditions, especially from typhoid, dysentery and diarrhoea. Cecil Aspinall-Oglander, the British official historian, reported that 90,000 British Empire soldiers were evacuated for illness during the campaign.[233][6] A total of 145,154 British troops fell sick, not counting Dominion or Indian troops; of these, 3,778 died, exclusive of those evacuated. The sick were transported from Gallipoli to hospitals in Egypt and Malta as quickly as possible as bases in the area of operations were insufficient. Approximately 2.84 percent of men removed as non-battle casualties died, against 0.91 percent in France and Flanders. The proportion of disease casualties to battle casualties was considerably higher in the Gallipoli campaign than it was on the campaigns of the Western Front.[242] Aspinall-Oglander gave the number of Ottoman troops evacuated sick as 64,440.[6] The largest cause of non-battle admissions to hospital for British troops was dysentery, with 29,728 men infected and another 10,383 men having diarrhoea. Other notable conditions were frostbite with 6,602 hospitalisations, gonorrhea 1,774 cases, and rheumatic fever 6,556 cases.[243] French casualties during the campaign amounted to around 47,000.[244][245][233] Of the French casualties, 27,169 were killed, wounded or missing with an implied 20,000 who fell sick.[235][e]
Allegations were made that Entente forces had attacked or bombarded Ottoman hospitals and hospital ships on several occasions between the start of the campaign and September 1915. By July 1915, 25 Ottoman hospitals had been built with 10,700 beds, and three hospital ships were in the area. The French Government disputed these complaints through the Red Cross and the British responded that if it happened then it was accidental. Russia, in turn, claimed that the Ottomans had attacked two of their hospital ships, Portugal and Vperiod, but the Ottoman Government replied that the vessels had been the victims of mines.[246] No chemical weapons were used at Gallipoli, although the Entente debated their use throughout the campaign and transported to the theatre quantities of gas, which was used against Ottoman troops in the Middle Eastern theatre two years later, during the Second and Third Battles of Gaza.[247][248][f]
Graves and memorials edit

The Commonwealth War Graves Commission (CWGC) is responsible for permanent cemeteries for all Commonwealth of Nations forces. There are 31 CWGC cemeteries on the Gallipoli peninsula: six at Helles (plus the only solitary grave, that of Lieutenant Colonel Charles Doughty-Wylie VC, Royal Welch Fusiliers), four at Suvla and 21 at Anzac.[252] For many of those killed or died on hospital ships and were buried at sea, there is no known grave; their names are recorded on one of five "memorials to the missing". The Lone Pine Memorial commemorates Australians killed in the Anzac sector, as well as New Zealanders with no known grave or who were buried at sea, while the Lone Pine, Hill 60 and Chunuk Bair memorials commemorate New Zealanders killed at Anzac. The Twelve Tree Copse Memorial commemorates the New Zealanders killed in the Helles sector, while British, Indian and Australian troops who died there are commemorated on the Helles Memorial at Cape Helles. British naval casualties who were lost or buried at sea are listed on memorials in the United Kingdom.[253][254]
.jpg)
There are three more CWGC cemeteries on the Greek island of Lemnos, the first one for the 352 Entente soldiers in Portianou, the second one for the 148 Australian and 76 New Zealand soldiers in the town of Moudros and the third one for the Ottoman soldiers (170 Egyptian and 56 Ottoman soldiers).[255] Lemnos was the hospital base for the Entente forces and most of the buried were among the men who died of their wounds.[256][257] Makeshift graves were created during the campaign, often with simple wooden crosses or markers; some graves were decorated more extensively.[258][259][260] There is a French cemetery on the Gallipoli Peninsula, located at Seddülbahir.[261] There are no large Ottoman/Turkish military cemeteries on the peninsula but there are numerous memorials, the main ones being the Çanakkale Martyrs' Memorial at Morto Bay, Cape Helles (near 'S' Beach), the Turkish Soldier's Memorial on Chunuk Bair and the memorial and open-air mosque for the 57th Regiment near Quinn's Post (Bomba Sirt). There are a number of memorials and cemeteries on the Asian shore of the Dardanelles, demonstrating the greater emphasis that Turkish historians place on the victory of 18 March over the subsequent fighting on the peninsula.[262]
Subsequent operations edit
Entente troops were withdrawn to Lemnos and then to Egypt.[263] French forces (renamed the Corps Expeditionnaire des Dardanelles in late October) were subsumed into the Army of the Orient and later employed at Salonika.[264][265] In Egypt, the British Imperial and Dominion troops from the Dardanelles along with fresh divisions from the United Kingdom and those at Salonika, became the Mediterranean Expeditionary Force (MEF), commanded by Lieutenant General Sir Archibald Murray. They joined the Force in Egypt to become the strategic reserve for the British Empire, consisting of 13 infantry and mounted divisions with 400,000 men. In March 1916, Murray took command of both these forces, forming them into the new Egyptian Expeditionary Force (EEF) and reorganising the units for service in Europe, Egypt and elsewhere in the Middle East.[266][267][268] While the ANZAC was disbanded, the AIF was expanded with three new Australian divisions being raised and a New Zealand Division was also formed. These units moved to the Western Front in mid-1916.[189]

The British yeomanry units that had fought dismounted at Gallipoli were reinforced and reorganised,[269][270] forming the 74th (Yeomanry) Division and a portion of the 75th Division.[271][272] Along with the Australian Light Horsemen and New Zealand Mounted Rifles remounted and reorganised into the Anzac Mounted Division, infantry from the 52nd (Lowland) Division, 42nd (East Lancashire) Division,[273] 53rd (Welsh) Division and 54th (East Anglian) Division,[274][275] later joined by additional remounted Australian Light Horsemen and British yeomanry from the Australian Mounted Division,[276] participated in the Sinai and Palestine campaign. The Egyptian Sinai was reoccupied in 1916, while Palestine and the northern Levant were captured from the Ottoman Empire during 1917 and 1918, before the Armistice of Mudros ended hostilities in the Middle Eastern theatre on 31 October. The Entente subsequently occupied Gallipoli and Istanbul and partitioned the Ottoman Empire.[277] The occupation ended in 1923 following the Turkish War of Independence, the Armistice of Mudanya and the Treaty of Lausanne.[278]
Legacy edit
The significance of the Gallipoli campaign is felt strongly in both Australia and New Zealand, despite their being only a portion of the Entente forces; the campaign is regarded in both nations as a "baptism of fire" and had been linked to their emergence as independent states.[279] Approximately 50,000 Australians served at Gallipoli and from 16,000 to 17,000 New Zealanders.[280][281][282][283] It has been argued that the campaign proved significant in the emergence of a unique Australian identity following the war, which has been closely linked to popular conceptualisations of the qualities of the soldiers that fought during the campaign, which became embodied in the notion of an "Anzac spirit".[284]
The landing on 25 April is commemorated every year in both countries as "Anzac Day". The first iteration was celebrated unofficially in 1916, at churches in Melbourne, Brisbane and London, before being officially recognised as a public holiday in all Australian states in 1923.[252] The day also became a national holiday in New Zealand in the 1920s.[285] Organised marches by veterans began in 1925, in the same year a service was held on the beach at Gallipoli; two years later the first official dawn service took place at the Sydney Cenotaph. During the 1980s, it became popular for Australian and New Zealand tourists to visit Gallipoli to attend the dawn service there and since then thousands have attended.[252] Over 10,000 people attended the 75th anniversary along with political leaders from Turkey, New Zealand, Britain and Australia.[286] Dawn services are also held in Australia; in New Zealand, dawn services are the most popular form of observance of this day.[287] Anzac Day remains the most significant commemoration of military casualties and veterans in Australia and New Zealand, surpassing Remembrance Day (Armistice Day).[288]
-
 The Çanakkale Martyrs' Memorial at Gallipoli Peninsula Historical Site, commemorating the loss of Ottoman and Anzac soldiers on the Gallipoli Peninsula
 -
 Anzac Day march in Wagga Wagga, Australia, in 2015
 -
![The Çanakkale 1915 Bridge on the Dardanelles strait, connecting Europe and Asia, is the longest suspension bridge in the world.[289]](//upload.wikimedia.org/wikipedia/commons/thumb/f/fc/1915_%C3%87anakkale_Bridge_20220327.jpg/234px-1915_%C3%87anakkale_Bridge_20220327.jpg) The Çanakkale 1915 Bridge on the Dardanelles strait, connecting Europe and Asia, is the longest suspension bridge in the world.[289]
The Çanakkale 1915 Bridge on the Dardanelles strait, connecting Europe and Asia, is the longest suspension bridge in the world.[289] -
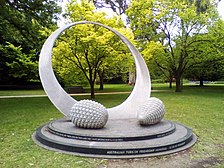 The Australian Turkish Friendship Memorial in Kings Domain, Melbourne honours WWI fallen soldiers and is a tribute to Australian-Turkish relations

.jpg)
![The Çanakkale 1915 Bridge on the Dardanelles strait, connecting Europe and Asia, is the longest suspension bridge in the world.[289]](/wiki/File:1915_%C3%87anakkale_Bridge_20220327.jpg)

Along with memorials and monuments established in towns and cities, many streets, public places and buildings were named after aspects of the campaign, especially in Australia and New Zealand.[290] Some examples include Gallipoli Barracks at Enoggera in Queensland,[291] and the Armed Forces Armoury in Corner Brook, Newfoundland which is named the Gallipoli Armouries.[292] Gallipoli also had a significant impact on popular culture, including film, television and song.[293] In 1971, Scottish-born Australian folk singer-songwriter Eric Bogle wrote a song called "And the Band Played Waltzing Matilda" which consisted of an account from a young Australian soldier who was maimed during the Gallipoli campaign. The song has been praised for its imagery, evoking the devastation at the Gallipoli landings. It remains widely popular and is considered by some to be an iconic anti-war song.[294][295]
In Turkey, the battle is thought of as a significant event in the state's emergence, although it is primarily remembered for the fighting that took place around the port of Çanakkale, where the Royal Navy was repulsed in March 1915.[296] For the Turks, 18 March has a similar significance as 25 April to Australians and New Zealanders; it is not a public holiday but is commemorated with special ceremonies.[297] The campaign's main significance to the Turkish people lies in the role it played in the emergence of Mustafa Kemal, who became the first president of the Republic of Turkey after the war.[298] "Çanakkale geçilmez" (Çanakkale is impassable) became a common phrase to express the state's pride at repulsing the attack and the song "Çanakkale içinde" (A Ballad for Chanakkale) commemorates the Turkish youth who fell during the battle.[299] Turkish filmmaker Sinan Cetin created a movie called Children of Canakkale.[300]
See also edit
- Timeline of the Gallipoli Campaign
- Gallipoli, a 1981 Australian film directed by Peter Weir
- Çanakkale 1915, a 2012 Turkish film based on some of the major political events of the Gallipoli campaign
- The Water Diviner, a 2014 Australian film directed by Russell Crowe
- Gallipoli Star, a military decoration of the Ottoman Empire
- "And the Band Played Waltzing Matilda", a 1971 song by Eric Bogle
- Gallipoli Art Prize, awarded annually by the Gallipoli Memorial Club
Notes edit
- ^ The operation would be complicated by having only five divisions, the rugged terrain of the peninsula, the small number of landing beaches and great difficulty in providing supplies.[46] Later on, the MEF was supported by about 2,000 civilian labourers from the Egyptian and Maltese Labour Corps.[4]
- ^ The 57th Regiment was not rebuilt and was not recreated in the Ottoman Army.[103]
- ^ The events of the day later gained significance, due to the loss of a company of the Norfolk Regiment. Having been recruited from men who worked on King George V's Sandringham estate they were dubbed the Sandringham Company. After being isolated and destroyed during 12 August attack it was rumoured that they had advanced into a mist and "simply disappeared". This gave rise to legends that they had been executed or that they had been taken by some supernatural force but some members were later found to have been taken prisoner.[167]
- ^ The enormous casualties at Gallipoli among Irish soldiers who had volunteered to fight in the British Army was a causal factor in the Irish War of Independence; as balladeers sang, "Twas better to die 'neath an Irish sky than in Suvla or Sedd el Bahr".[231]
- ^ Appendix 5 of the French official history (AFGG 8,1) has a one page table that not only splits these into subcategory columns but also breaks out the casualties into nine time period rows.[235] For comparative purposes, out of 205,000 British casualties, 115,000 were killed, missing and wounded, 90,000 were evacuated sick.[233]
- ^ In November 1918, the Canterbury Mounted Rifles and the 7th Light Horse from the Anzac Mounted Division, were sent to Gallipoli to "monitor Turkish compliance with the terms of the Armistice".[249] The 900 troopers camped at Camburnu near Kilid Bahr for three winter months and reconnoitred the Peninsula, identifying graves and inspecting Ottoman positions.[250] The troopers returned to Egypt on 19 January 1919, less 11 who had died and 110 who were sick in hospital.[251]
Footnotes edit
- ^ Travers 2001, p. 13; Rance 2017, pp. 16–17, 54–56.
- ^ a b Jung 2003, pp. 42–43.
- ^ Kurtuluş Savaşı Komutanları.
- ^ a b c d Aspinall-Oglander 1929, p. 395.
- ^ Rance 2017, pp. 16–17, 44–47, 55–56.
- ^ a b c d e f g h i Erickson 2001a, p. 94.
- ^ a b Erickson 2001a, pp. 94–95.
- ^ Erickson 2015, p. 178.
- ^ Rance 2017, pp. 16–17.
- ^ a b c d Clodfelter 2017, p. 417.
- ^ a b c Erickson 2001a, p. 327.
- ^ Dennis 2008, pp. 32, 38.
- ^ Lewis, Balderstone & Bowan 2006, p. 110.
- ^ a b c McGibbon 2000, p. 198.
- ^ Fewster, Basarin & Basarin 2003, p. 44.
- ^ Broadbent 2005, pp. 19–23.
- ^ Baldwin 1962, p. 40.
- ^ Erickson 2013, p. 159.
- ^ Tauber 1993, pp. 22–25.
- ^ Dennis 2008, p. 224.
- ^ Corbett 2009a, pp. 158, 166.
- ^ Haythornthwaite 2004, p. 6.
- ^ Carlyon 2001, p. 34.
- ^ Strachan 2001, p. 115.
- ^ Broadbent 2005, pp. 27–28.
- ^ Tamworth Daily Observer 1915, p. 2.
- ^ Travers 2001, p. 20.
- ^ a b c d e Broadbent 2005, p. 40.
- ^ Gilbert 2013, pp. 42–43.
- ^ Hart 2013a, pp. 9–10.
- ^ Hart 2013a, p. 10.
- ^ Hart 2013a, pp. 11–12.
- ^ a b Fromkin 1989, p. 135.
- ^ a b c Baldwin 1962, p. 60.
- ^ James 1995, p. 61.
- ^ Hart 2013a, p. 12.
- ^ Fromkin 1989, p. 151.
- ^ Broadbent 2005, pp. 33–34.
- ^ a b Broadbent 2005, p. 35.
- ^ Wahlert 2008, p. 15.
- ^ Stevens 2001, pp. 44–45.
- ^ Grey 2008, p. 92.
- ^ Haythornthwaite 2004, p. 25.
- ^ Wahlert 2008, p. 16.
- ^ Doyle & Bennett 1999, p. 14.
- ^ a b Holmes 2001, p. 343.
- ^ McGibbon 2000, p. 191.
- ^ Haythornthwaite 2004, p. 21.
- ^ Reagan 1992, p. 166.
- ^ Erickson 2001b, p. 983.
- ^ a b c Doyle & Bennett 1999, p. 12.
- ^ Hart 2013b, p. 52.
- ^ a b c d e Dennis 2008, p. 226.
- ^ Travers 2001, p. 48.
- ^ Hart 2013b, p. 54.
- ^ Travers 2001, p. 39.
- ^ a b c Aspinall-Oglander 1929, p. 139.
- ^ Carlyon 2001, p. 100.
- ^ Travers 2001, p. 38.
- ^ Carlyon 2001, p. 83.
- ^ Haythornthwaite 2004, p. 16.
- ^ a b Travers 2001, p. 13.
- ^ Carlyon 2001, p. 31.
- ^ Butler 2011, p. 121.
- ^ Kinross 1995, pp. 73–74.
- ^ Bean 1941a, p. 179.
- ^ James 1995, p. 74.
- ^ James 1995, p. 75.
- ^ Aspinall-Oglander 1929, p. 154.
- ^ James 1995, p. 76.
- ^ ATASE, Canakkale 2, p. 46, 56–57.
- ^ Sevki Yazman, "Turk Canakkale", p. 100.
- ^ Aspinall-Oglander 1929, pp. 154–57.
- ^ a b James 1995, p. 77.
- ^ Broadbent 2005, p. 42.
- ^ Gilbert 2013, p. 46.
- ^ Broadbent 2005, p. 43.
- ^ Broadbent 2005, p. 47.
- ^ a b c Stevenson 2007, p. 189.
- ^ Broadbent 2005, p. 45.
- ^ Broadbent 2005, p. 108.
- ^ Life 1942, p. 28.
- ^ McGibbon 2000, p. 195.
- ^ Travers 2001, pp. 50–53.
- ^ Travers 2001, p. 72.
- ^ a b c d Gilbert 2013, p. 43.
- ^ a b c d e Coulthard-Clark 2001, p. 102.
- ^ Özakman 2008, pp. 226–230.
- ^ Özakman 2008, pp. 235–236.
- ^ Özakman 2008, pp. 300–304.
- ^ Dennis 2008, p. 227.
- ^ Dennis 2008, pp. 227–28.
- ^ a b c Dennis 2008, p. 228.
- ^ a b c d e f g Stevens 2001, p. 45.
- ^ Jose 1941, p. 242.
- ^ Frame 2004, p. 119.
- ^ a b c Stevens 2001, p. 46.
- ^ Broadbent 2005, p. 44.
- ^ Aspinall-Oglander 1929, pp. 315–16.
- ^ Wahlert 2008, p. 19.
- ^ Broadbent 2005, p. 102.
- ^ Aspinall-Oglander 1929, pp. 232–36.
- ^ a b Erickson 2001a, p. xv.
- ^ Erickson 2001a, p. 84.
- ^ Aspinall-Oglander 1929, p. 318.
- ^ Carlyon 2001, p. 232.
- ^ Thys-Şenocak & Aslan 2008, p. 30.
- ^ Perrett 2004, p. 192.
- ^ Broadbent 2005, p. 121.
- ^ Broadbent 2005, pp. 122–23.
- ^ Broadbent 2005, pp. 124–25.
- ^ Broadbent 2005, pp. 126, 129, 134.
- ^ Broadbent 2005, pp. 129–30.
- ^ Pitt & Young 1970, pp. 918–19.
- ^ McCartney 2008, p. 31.
- ^ Usborne 1933, p. 327.
- ^ a b O'Connell 2010, p. 73.
- ^ Broadbent 2005, p. 134.
- ^ Broadbent 2005, pp. 131, 136.
- ^ Broadbent 2005, p. 137.
- ^ a b Broadbent 2005, pp. 137–42.
- ^ Broadbent 2005, p. 143.
- ^ a b Grey 2008, p. 96.
- ^ Broadbent 2005, p. 148.
- ^ Broadbent 2005, p. 149.
- ^ Crawford & Buck 2020, p. 28.
- ^ a b c Erickson 2001a, p. 87.
- ^ Broadbent 2005, p. 154.
- ^ Bean 1941b, p. 161.
- ^ Broadbent 2005, pp. 149–50.
- ^ a b Broadbent 2005, pp. 156–57.
- ^ Laidlaw, Private Victor. "Diaries of Private Victor Rupert Laidlaw, 1914–1984 [manuscript]". State Library of Victoria. Archived from the original on 7 February 2023. Retrieved 18 May 2020.
- ^ Burt 1988, pp. 158–59.
- ^ Burt 1988, pp. 131, 276.
- ^ Broadbent 2005, p. 165.
- ^ a b Brenchley & Brenchley 2001, p. 113.
- ^ O'Connell 2010, p. 74.
- ^ Pitt & Young 1970, p. 918.
- ^ a b Erickson 2001a, p. 89.
- ^ Broadbent 2005, pp. 169–70.
- ^ Broadbent 2005, p. 170.
- ^ Aspinall-Oglander 1992, pp. 46, 53.
- ^ a b Gilbert 2013, p. 44.
- ^ Haythornthwaite 2004, p. 15.
- ^ Aspinall-Oglander 1992, p. 95.
- ^ Aspinall-Oglander 1992, p. 111.
- ^ Snelling 1995, p. 103.
- ^ Willmott 2009, p. 387.
- ^ Halpern 1995, p. 119.
- ^ Hore 2006, p. 66.
- ^ O'Connell 2010, p. 76.
- ^ Broadbent 2005, p. 190.
- ^ Carlyon 2001, p. 344.
- ^ Travers 2001, pp. 271–73.
- ^ Grey 2008, p. 95.
- ^ a b Broadbent 2005, p. 191.
- ^ Ferreira, Sylvain (11 November 2015). "11 mai, l'escadrille MF 98 T est opérationnelle". Dardanelles 1915–2015 LE CORPS EXPÉDITIONNAIRE D'ORIENT (in French). Archived from the original on 20 May 2020. Retrieved 31 August 2020.
As indicated by the initials of the squadron (MF), they were equipped with eight MF.9 aircraft.
- ^ Haythornthwaite 2004, p. 83.
- ^ Aspinall-Oglander 1992, p. 273.
- ^ Ekins 2009, p. 29.
- ^ Fewster, Basarin & Basarin 2003, p. 112.
- ^ a b McGibbon 2000, p. 197.
- ^ Coulthard-Clark 2001, p. 109.
- ^ a b Coulthard-Clark 2001, p. 110.
- ^ Carlyon 2001, p. 442.
- ^ Aspinall-Oglander 1992, pp. 248, 286, 312–13.
- ^ a b Broadbent 2005, p. 232.
- ^ Cameron 2011, p. 17.
- ^ Cameron 2011, p. 147.
- ^ Nicholson 2007, pp. 155–92.
- ^ Aspinall-Oglander 1992, p. 376.
- ^ Moorehead 1997, p. 158.
- ^ Carlyon 2001, p. 314.
- ^ a b Wahlert 2008, p. 26.
- ^ Broadbent 2005, pp. 244–45.
- ^ Carlyon 2001, p. 515.
- ^ Hall 2010, pp. 48–50.
- ^ Pitt & Young 1970, p. 919.
- ^ O'Connell 2010, p. 77.
- ^ O'Connell 2010, pp. 76–77.
- ^ Hart 2013b, p. 387.
- ^ Broadbent 2005, pp. 249, 252.
- ^ a b c Gilbert 2013, p. 47.
- ^ Ben-Gavriel 1999, p. 258.
- ^ Broadbent 2005, pp. 188, 191, 254.
- ^ Broadbent 2005, pp. 255–56.
- ^ Broadbent 2005, p. 260.
- ^ Travers 2001, p. 208.
- ^ a b Grey 2008, p. 98.
- ^ a b c d Hart 2007, p. 12.
- ^ Erickson 2001a, p. 93.
- ^ Carlyon 2001, p. 526.
- ^ a b c Broadbent 2005, p. 266.
- ^ a b Parker 2005, p. 126.
- ^ Nicholson 2007, p. 480.
- ^ Lockhart 1950, p. 17.
- ^ Aspinall-Oglander 1992, p. 478.
- ^ Corbett 2009b, p. 255.
- ^ Broadbent 2005, pp. 268, 269; Carlyon 2001, p. 518.
- ^ Haythornthwaite 2004, p. 90; Grey 2008, p. 98.
- ^ Doyle & Bennett 1999, p. 15; Haythornthwaite 2004, p. 90.
- ^ Hart 2007, pp. 11–12.
- ^ a b Broadbent 2005, p. 268.
- ^ Hart 2007, p. 10.
- ^ O'Connell 2010, pp. 76–78.
- ^ O'Connell 2010, p. 78.
- ^ Brenchley & Brenchley 2001, pp. 113–14.
- ^ Broadbent 2005, pp. 233, 270.
- ^ Neillands 2004, p. 259.
- ^ Grey 2008, pp. 100, 107.
- ^ Haythornthwaite 2004, p. 14.
- ^ Cassar 2004, pp. 202–203, 259, 263.
- ^ Baldwin 1962, p. 94.
- ^ Pick 1990, pp. 181, 209.
- ^ Pick 1990, p. 210.
- ^ Erickson 2001a, p. 127.
- ^ Grey 2008, p. 117.
- ^ a b c Wahlert 2008, p. 29.
- ^ a b Gatchel 1996, p. 10.
- ^ Weigley 2005, pp. 393–96.
- ^ Hart 2013b, pp. 460–62.
- ^ Coates 1999, p. 70.
- ^ Dexter 1961, p. 454.
- ^ Cassar 2004, p. 180.
- ^ Stevenson 2005, pp. 121–22.
- ^ Broadbent 2005, p. 270.
- ^ a b c Holmes 2001, p. 203.
- ^ Neillands 2004, p. 384.
- ^ Taylor 1965, pp. 103–06.
- ^ Travers 2001, pp. 297–98.
- ^ West 2016, p. 97.
- ^ a b NZ History 2016.
- ^ a b c d e Aspinall-Oglander 1992, p. 484.
- ^ Department of Veterans Affairs, p. 2.
- ^ a b c Lepetit, Tournyol du Clos & Rinieri 1923, p. 549.
- ^ "Australian fatalities at Gallipoli". Australian War Memorial. 6 December 2019. Retrieved 18 June 2023.
- ^ Carlyon 2001, p. 531.
- ^ Crawford & Buck 2020, pp. 83, 111.
- ^ Travers 2001, p. 3.
- ^ Crawford & Buck 2020, p. 100.
- ^ Crawford & Buck 2020, pp. 110–111.
- ^ Harrison 2010, p. 296.
- ^ Mitchell & Smith 1931, p. 206.
- ^ Hughes 2005, p. 64.
- ^ Erickson 2001b, p. 1009.
- ^ Taskiran 2005.
- ^ Sheffy 2005, p. 278.
- ^ Falls & MacMunn 1996, pp. 336–37, 341, 349.
- ^ Kinloch 2007, p. 327.
- ^ 2nd Light Horse Brigade 1918, p. 4.
- ^ Powles & Wilkie 1922, pp. 263–65.
- ^ a b c Wahlert 2008, p. 9.
- ^ Cape Helles Memorial.
- ^ Wahlert 2008, pp. 9–10.
- ^ Kirbaki 2015.
- ^ Mudros Moslem Cemetery.
- ^ Portianos Military Cemetery.
- ^ Austin & Duffy 2006.
- ^ Dando-Collins 2012.
- ^ Newton 1925.
- ^ Travers 2001, p. 229.
- ^ Wahlert 2008, p. 10.
- ^ Bean 1941b, p. 905.
- ^ Dutton 1998, p. 155.
- ^ Hughes 2005, pp. 64–67.
- ^ Keogh & Graham 1955, p. 32.
- ^ Wavell 1968, p. 41.
- ^ Gullett 1941, p. 22.
- ^ Perry 1988, p. 23.
- ^ Griffith 1998, pp. 168–69.
- ^ Keogh & Graham 1955, pp. 122, 124.
- ^ Becke 1937, p. 121.
- ^ Falls & MacMunn 1996, pp. 160–271.
- ^ Grey 2008, pp. 99–100, 117.
- ^ Dennis 2008, pp. 405–07.
- ^ Falls 1930, p. 274.
- ^ Holmes 2001, p. 345.
- ^ Simkins, Jukes & Hickey 2003, p. 17.
- ^ Williams 1999, p. 260.
- ^ Crawford & Buck 2020, pp. 8, 117.
- ^ Coulthard-Clark 2001, p. 103.
- ^ Green 2013.
- ^ Ministry for Culture and Heritage 2016, p. 1.
- ^ Dennis 2008, pp. 37–42.
- ^ Broadbent 2005, p. 278.
- ^ Fewster, Basarin & Basarin 2003, p. 13.
- ^ Anzac Day Today.
- ^ Dennis 2008, p. 32.
- ^ "Groundbreaking ceremony for bridge over Dardanelles to take place on March 18". Hürriyet Daily News. 17 March 2017. Archived from the original on 18 March 2017. Retrieved 19 March 2017.
- ^ Wilson.
- ^ Jobson 2009, p. 103.
- ^ CBC News 2012.
- ^ Dennis 2008, pp. 203–07, 424–26.
- ^ Dennis 2008, p. 426.
- ^ Keane 2015.
- ^ Fewster, Basarin & Basarin 2003, pp. 6–7.
- ^ Fewster, Basarin & Basarin 2003, p. 7.
- ^ Fewster, Basarin & Basarin 2003, p. 8.
- ^ Eren 2003, p. 5.
- ^ Hammer 2017.
References edit
Books edit
- Aspinall-Oglander, Cecil Faber (1929). Military Operations Gallipoli: Inception of the Campaign to May 1915. History of the Great War Based on Official Documents by Direction of the Historical Section of the Committee of Imperial Defence. Vol. I (1st ed.). London: Heinemann. OCLC 464479053.
- Aspinall-Oglander, Cecil Faber (1992) [1932]. Military Operations Gallipoli: May 1915 to the Evacuation. History of the Great War Based on Official Documents by Direction of the Historical Section of the Committee of Imperial Defence. Vol. II (facs. repr. Imperial War Museum Department of Printed Books and Battery Press ed.). London: Heinemann. ISBN 978-0-89839-175-6.
- Austin, Ronald; Duffy, Jack (2006). Where Anzacs Sleep: the Gallipoli Photos of Captain Jack Duffy, 8th Battalion. McCrae, Victoria: Slouch Hat Publications. ISBN 978-0-9758353-2-6.
- Baldwin, Hanson (1962). World War I: An Outline History. London: Hutchinson. OCLC 793915761.
- Bean, Charles (1941a) [1921]. The Story of ANZAC from the Outbreak of War to the End of the First Phase of the Gallipoli Campaign, May 4, 1915. Official History of Australia in the War of 1914–1918. Vol. I (11th ed.). Sydney: Angus and Robertson. OCLC 220878987. Archived from the original on 6 September 2019. Retrieved 11 July 2015.
- Bean, Charles (1941b) [1921]. The Story of Anzac from 4 May 1915, to the Evacuation of the Gallipoli Peninsula. Official History of Australia in the War of 1914–1918. Vol. II (11th ed.). Canberra: Australian War Memorial. OCLC 39157087. Archived from the original on 6 September 2019. Retrieved 11 July 2015.
- Becke, Major Archibald Frank (1937). Order of Battle of Divisions: The 2nd-Line Territorial Force Divisions (57th–69th) with The Home-Service Divisions (71st–73rd) and 74th and 75th Divisions. History of the Great War Based on Official Documents by Direction of the Historical Section of the Committee of Imperial Defence. Vol. IIb. London: HMSO. ISBN 978-1-871167-00-9.
- Ben-Gavriel, Moshe Ya'aqov (1999). Wallas, Armin A. (ed.). Tagebücher: 1915 bis 1927 [Diaries, 1915–1927] (in German). Wien: Böhlau. ISBN 978-3-205-99137-3.
- Brenchley, Fred; Brenchley, Elizabeth (2001). Stoker's Submarine: Australia's Daring Raid on the Dardanellles on the Day of the Gallipoli Landing. Sydney: Harper Collins. ISBN 978-0-7322-6703-2.
- Broadbent, Harvey (2005). Gallipoli: The Fatal Shore. Camberwell, Victoria: Viking/Penguin. ISBN 978-0-670-04085-8.
- Butler, Daniel (2011). Shadow of the Sultan's Realm: The Destruction of the Ottoman Empire and the Creation of the Modern Middle East. Washington, D.C.: Potomac Books. ISBN 978-1-59797-496-7.
- Burt, R. A. (1988). British Battleships 1889–1904. Annapolis, Maryland: Naval Institute Press. ISBN 978-0-87021-061-7.
- Cameron, David (2011). Gallipoli: The Final Battles and Evacuation of Anzac. Newport, NSW: Big Sky. ISBN 978-0-9808140-9-5.
- Carlyon, Les (2001). Gallipoli. Sydney: Pan Macmillan. ISBN 978-0-7329-1089-1.
- Cassar, George H. (2004). Kitchener's War: British Strategy from 1914 to 1916. Lincoln, Nebraska: Potomac Books. ISBN 978-1-57488-709-9.
- Clodfelter, M. (2017). Warfare and Armed Conflicts: A Statistical Encyclopedia of Casualty and Other Figures, 1492–2015 (4th ed.). Jefferson, North Carolina: McFarland. ISBN 978-0786474707.
- Coates, John (1999). Bravery above Blunder: The 9th Australian Division at Finschhafen, Sattelberg and Sio. South Melbourne: Oxford University Press. ISBN 978-0-19-550837-6.
- Corbett, J. S. (2009a) [1920]. Naval Operations. History of the Great War Based on Official Documents by Direction of the Historical Section of the Committee of Imperial Defence. Vol. I (repr. Imperial War Museum Department of Printed Books and Naval & Military Press ed.). London: Longmans. ISBN 978-1-84342-489-5. Retrieved 27 May 2014.
- Corbett, J. S. (2009b) [1923]. Naval Operations. History of the Great War Based on Official Documents by Direction of the Historical Section of the Committee of Imperial Defence. Vol. III (repr. Imperial War Museum Department of Printed Books and Naval & Military Press ed.). London: Longmans. ISBN 978-1-84342-491-8. Retrieved 27 May 2014.
- Coulthard-Clark, Chris (2001). The Encyclopaedia of Australia's Battles (2nd ed.). Crow's Nest, NSW: Allen & Unwin. ISBN 978-1-86508-634-7.
- Cowan, James (1926). The Maoris in the Great War (including Gallipoli). Auckland, NZ: Whitcombe & Tombs for the Maori Regimental Committee. OCLC 4203324. Archived from the original on 2 February 2023. Retrieved 3 February 2023.
- Crawford, John; Buck, Matthew (2020). Phenomenal and Wicked: Attrition and Reinforcements in the New Zealand Expeditionary Force at Gallipoli. Wellington: New Zealand Defence Force. ISBN 978-0-478-34812-5. "ebook". New Zealand Defence Force. 2020. Archived from the original on 8 August 2020. Retrieved 19 August 2020.
- Dando-Collins, Stephen (2012). Crack Hardy: From Gallipoli to Flanders to the Somme, the True Story of Three Australian Brothers at War. North Sydney: Vintage Books. ISBN 978-1-74275-573-1.
- Dennis, Peter; Grey, Jeffrey; Morris, Ewan; Prior, Robin; Bou, Jean (2008). The Oxford Companion to Australian Military History (2nd ed.). Melbourne: Oxford University Press. ISBN 978-0-19-551784-2.
- Dexter, David (1961). The New Guinea Offensives. Australia in the War of 1939–1945, Series 1 – Army. Vol. VII (1st ed.). Canberra, ACT: Australian War Memorial. OCLC 2028994. Archived from the original on 17 March 2021. Retrieved 14 July 2015.
- Dutton, David (1998). The Politics of Diplomacy: Britain, France and the Balkans in the First World War. London: I. B. Tauris. ISBN 978-1-86064-112-1.
- Eren, Ramazan (2003). Çanakkale Savaş Alanları Gezi Günlüğü [Çanakkale War Zone Travel Diary] (in Turkish). Çanakkale: Eren Books. ISBN 978-975-288-149-5.
- Erickson, Edward J. (2001a) [2000]. Ordered to Die: A History of the Ottoman Army in the First World War. Westport, Connecticut: Greenwood. ISBN 978-0-313-31516-9.
- Erickson, Edward J. (2015) [2010]. Gallipoli: the Ottoman Campaign. Barnsley: Pen & Sword. ISBN 978-1783461660.
- Erickson, Edward J. (2013). Ottomans and Armenians: A Study in Counterinsurgency. New York: Palgrave Macmillan. ISBN 978-1-137-36220-9.
- Falls, Cyril; MacMunn, George (maps) (1996) [1928]. Military Operations Egypt & Palestine from the Outbreak of War with Germany to June 1917. Official History of the Great War Based on Official Documents by Direction of the Historical Section of the Committee of Imperial Defence. Vol. I (repr. Imperial War Museum and Battery Press ed.). London: HMSO. ISBN 978-0-89839-241-8.
- Falls, Cyril; Becke, A. F. (maps) (1930). Military Operations Egypt & Palestine: From June 1917 to the End of the War. Official History of the Great War Based on Official Documents by Direction of the Historical Section of the Committee of Imperial Defence. Vol. II. Part 1. London: HMSO. OCLC 644354483.
- Fewster, Kevin; Basarin, Vecihi; Basarin, Hatice Hurmuz (2003) [1985]. Gallipoli: The Turkish Story. Crow's Nest, NSW: Allen & Unwin. ISBN 978-1-74114-045-3.
- Frame, Tom (2004). No Pleasure Cruise: The Story of the Royal Australian Navy. Crow's Nest, NSW: Allen & Unwin. ISBN 978-1-74114-233-4.
- Fromkin, David (1989). A Peace to End All Peace: The Fall of the Ottoman Empire and the Creation of the Modern Middle East. New York: Henry Holt. ISBN 978-0-8050-0857-9.
- Gatchel, Theodore L. (1996). At the Water's Edge: Defending against the Modern Amphibious Assault. Annapolis, Maryland: Naval Institute Press. ISBN 978-1-55750-308-4.
- Grey, Jeffrey (2008). A Military History of Australia (3rd ed.). Port Melbourne: Cambridge University Press. ISBN 978-0-521-69791-0.
- Griffith, Paddy (1998). British Fighting Methods in the Great War. London: Routledge. ISBN 978-0-7146-3495-1.
- Gullett, Henry Somer (1941) [1923]. The Australian Imperial Force in Sinai and Palestine, 1914–1918. Official History of Australia in the War of 1914–1918. Vol. VII (10th ed.). Sydney: Angus and Robertson. OCLC 220901683. Archived from the original on 10 August 2019. Retrieved 14 July 2015.
- Hall, Richard (2010). Balkan Breakthrough: The Battle of Dobro Pole 1918. Bloomington: Indiana University Press. ISBN 978-0-253-35452-5.
- Halpern, Paul G. (1995). A Naval History of World War I. Annapolis, Maryland: Naval Institute Press. ISBN 978-1-55750-352-7.
- Harrison, Mark (2010). The Medical War: British Military Medicine in the First World War. Oxford: Oxford University Press. ISBN 978-0-19957-582-4.
- Hart, Peter (2013b) [2011]. Gallipoli. London: Profile Books. ISBN 978-1-84668-161-5.
- Haythornthwaite, Philip (2004) [1991]. Gallipoli 1915: Frontal Assault on Turkey. Campaign Series. London: Osprey. ISBN 978-0-275-98288-1.
- Holmes, Richard, ed. (2001). The Oxford Companion to Military History. Oxford: Oxford University Press. ISBN 978-0-19-866209-9.
- Hore, Peter (2006). The Ironclads. London: Southwater. ISBN 978-1-84476-299-6.
- James, Robert Rhodes (1995) [1965]. Gallipoli: A British Historian's View. Parkville, VIC: Department of History, University of Melbourne. ISBN 978-0-7325-1219-4.
- Jobson, Christopher (2009). Looking Forward, Looking Back: Customs and Traditions of the Australian Army. Wavell Heights, Queensland: Big Sky. ISBN 978-0-9803251-6-4.
- Jose, Arthur (1941) [1928]. The Royal Australian Navy, 1914–1918. Official History of Australia in the War of 1914–1918. Vol. IX (9th ed.). Canberra: Australian War Memorial. OCLC 271462423. Archived from the original on 12 July 2015. Retrieved 14 July 2015.
- Jung, Peter (2003). Austro-Hungarian Forces in World War I. Part 1. Oxford: Osprey. ISBN 978-1-84176-594-5.
- Keogh, Eustace; Graham, Joan (1955). Suez to Aleppo. Melbourne: Directorate of Military Training (Wilkie). OCLC 220029983.
- Kinloch, Terry (2007). Devils on Horses: In the Words of the Anzacs in the Middle East 1916–19. Auckland, NZ: Exisle. OCLC 191258258.
- Kinross, Patrick (1995) [1964]. Ataturk: The Rebirth of a Nation. London: Phoenix. ISBN 978-0-297-81376-7.
- Lepetit, Vincent; Tournyol du Clos, Alain; Rinieri, Ilario (1923). La campagne d'Orient (Dardanelles et Salonique). Tome VIII. Premier Volume. (février 1915-août 1916) [8,1] [Ministry of War, Staff of the Army, Historical Service, French Armies in the Great War]. Les armées françaises dans la Grande guerre. Based on Official Documents by Direction of the Ministère De la Guerre, Etat-Major de l'Armée – Service Historique (in French). Vol. I. Paris: Imprimerie Nationale. OCLC 491775878. Archived from the original on 8 April 2022. Retrieved 20 September 2020.
- Lewis, Wendy; Balderstone, Simon; Bowan, John (2006). Events That Shaped Australia. Frenchs Forest, NSW: New Holland. ISBN 978-1-74110-492-9.
- Lockhart, Sir Robert Hamilton Bruce (1950). The Marines Were There: The Story of the Royal Marines in the Second World War. London: Putnam. OCLC 1999087.
- McCartney, Innes (2008). British Submarines of World War I. Oxford: Osprey. ISBN 978-1-84603-334-6.
- McGibbon, Ian, ed. (2000). The Oxford Companion to New Zealand Military History. Auckland, NZ: Oxford University Press. ISBN 978-0-19-558376-2.
- Mitchell, Thomas John; Smith, G. M. (1931). Casualties and Medical Statistics of the Great War. History of the Great War. Based on Official Documents by Direction of the Committee of Imperial Defence. London: HMSO. OCLC 14739880.
- Moorehead, Alan (1997) [1956]. Gallipoli. Ware: Wordsworth. ISBN 978-1-85326-675-1.
- Neillands, Robin (2004) [1998]. The Great War Generals on the Western Front 1914–1918. London Books: Magpie. ISBN 978-1-84119-863-7.
- Newton, L. M. (1925). The Story of the Twelfth: A Record of the 12th Battalion, A. I. F. during the Great War of 1914–1918. Slouch Hat Publications.
- Nicholson, Gerald W. L. (2007). The Fighting Newfoundlander. Carleton Library Series. Vol. CCIX. McGill-Queen's University Press. ISBN 978-0-7735-3206-9.
- O'Connell, John (2010). Submarine Operational Effectiveness in the 20th Century (1900–1939). Part One. New York: Universe. ISBN 978-1-4502-3689-8.
- Özakman, Turgut (2008). Dirilis: Canakkale 1915. Ankara: Bilgi Yayinev. ISBN 978-975-22-0247-4.
- Parker, John (2005). The Gurkhas: The inside Story of the World's Most Feared Soldiers. London: Headline Books. ISBN 978-0-7553-1415-7.
- Perrett, Bryan (2004). For Valour: Victoria Cross and Medal of Honor Battles. London: Cassel Military Paperbacks. ISBN 978-0-304-36698-9.
- Perry, Frederick (1988). The Commonwealth Armies: Manpower and Organisation in Two World Wars. Manchester: Manchester University Press. ISBN 978-0-7190-2595-2.
- Pick, Walter Pinhas (1990). "Meissner Pasha and the Construction of Railways in Palestine and Neighbouring Countries". In Gilbar, Gad (ed.). Ottoman Palestine, 1800–1914: Studies in Economic and Social History. Leiden: Brill Archive. ISBN 978-90-04-07785-0.
- Pitt, Barrie; Young, Peter (1970). History of the First World War. Vol. III. London: B.P.C. OCLC 669723700.
- Powles, C. Guy; Wilkie, A. (1922). The New Zealanders in Sinai and Palestine. Official History New Zealand's Effort in the Great War. Vol. III. Auckland, NZ: Whitcombe & Tombs. OCLC 2959465. Archived from the original on 2 February 2016. Retrieved 15 July 2016.
- Thys-Şenocak, Lucienne; Aslan, Carolyn (2008). "Narratives of Destruction and Construction: The Complex Cultural Heritage of the Gallipoli Peninsula". In Rakoczy, Lila (ed.). The Archaeology of Destruction. Newcastle: Cambridge Scholars. pp. 90–106. ISBN 978-1-84718-624-9.
- Rance, Philip (ed./trans.) (2017). The Struggle for the Dardanelles. Major Erich Prigge. The Memoirs of a German Staff Officer in Ottoman Service. Barnsley: Pen & Sword. ISBN 978-1-78303-045-3.
- Reagan, Geoffrey (1992). The Guinness Book of Military Anecdotes. Enfield: Guinness. ISBN 978-0-85112-519-0.
- Simkins, Peter; Jukes, Geoffrey; Hickey, Michael (2003). The First World War: The War to End All Wars. Oxford: Osprey. ISBN 978-1-84176-738-3.
- Snelling, Stephen (1995). VCs of the First World War: Gallipoli. Thrupp, Stroud: Gloucestershire Sutton. ISBN 978-0-905778-33-4.
- Strachan, Hew (2003) [2001]. The First World War: To Arms. Vol. I. Oxford: Oxford University Press. ISBN 978-0-19-926191-8.
- Stevens, David (2001). The Royal Australian Navy. The Australian Centenary History of Defence. Vol. III. South Melbourne, Victoria: Oxford University Press. ISBN 978-0-19-555542-4.
- Stevenson, David (2005). 1914–1918: The History of the First World War. London: Penguin. ISBN 978-0-14-026817-1.
- Taylor, Alan John Percivale (1965). English History 1914–1945 (Pelican 1982 ed.). Oxford: Oxford University Press. ISBN 978-0-19-821715-2.
- Tauber, Eliezer (1993). The Arab Movements in World War I. London: Routledge. ISBN 978-0-7146-4083-9.
- Travers, Tim (2001). Gallipoli 1915. Stroud: Tempus. ISBN 978-0-7524-2551-1.
- Usborne, Cecil (1933). Smoke on the Horizon: Mediterranean Fighting, 1914–1918. London: Hodder and Stoughton. OCLC 221672642.
- Wahlert, Glenn (2008). Exploring Gallipoli: An Australian Army Battlefield Guide. Australian Army Campaign Series. Vol. IV. Canberra: Army History Unit. ISBN 978-0-9804753-5-7.
- Wavell, Field Marshal Earl (1968) [1933]. "The Palestine Campaigns". In Sheppard, Eric William (ed.). A Short History of the British Army (4th ed.). London: Constable. OCLC 35621223.
- Weigley, Russell F. (2005). "Normandy to Falaise: A Critique of Entente Operational Planning in 1944". In Krause, Michael D.; Phillips, R. Cody (eds.). Historical Perspectives of the Operational Art. Washington, D.C.: Center of Military History, United States Army. pp. 393–414. OCLC 71603395. Archived from the original on 20 February 2014. Retrieved 12 November 2016.
- West, Brad (2016). War Memory and Commemoration. Memory Studies: Global Constellations. London and New York: Routledge. ISBN 978-1-47245-511-6.
- Williams, John (1999). The ANZACS, the Media and the Great War. Sydney: UNSW Press. ISBN 978-0-86840-569-8.
- Willmott, Hedley Paul (2009). The Last Century of Sea Power: From Port Arthur to Chanak, 1894–1922. Bloomington: Indiana University Press. ISBN 978-0-253-00356-0.
Diaries edit
- Laidlaw, Private Victor. "Diaries of Private Victor Rupert Laidlaw, 1914-1984". State Library of Victoria, Melbourne, Australia. [manuscript]. Retrieved 19 May 2020.
Journals edit
- Doyle, Peter; Bennett, Matthew (1999). "Military Geography: The Influence of Terrain in the Outcome of the Gallipoli Campaign, 1915". The Geographical Journal. 165 (1 (March)). London: Royal Geographical Society: 12–36. Bibcode:1999GeogJ.165...12D. doi:10.2307/3060508. ISSN 0016-7398. JSTOR 3060508.
- Ekins, Ashley (2009). "Bloody Ridge: The Assault of Lone Pine". Wartime (47). Canberra: Australian War Memorial: 12–14, 16–18. ISSN 1328-2727.
- Erickson, Edward (2001b). "Strength Against Weakness: Ottoman Military Effectiveness at Gallipoli, 1915". The Journal of Military History. 65 (4): 981–1012. doi:10.2307/2677626. ISSN 1543-7795. JSTOR 2677626.
- Gilbert, Greg (2013). "Air War Over the Dardanelles". Wartime (61). Canberra: Australian War Memorial: 42–47. ISSN 1328-2727.
- Hart, Peter (2007). "War is Helles: The Real Fight for Gallipoli". Wartime (38). Canberra: Australian War Memorial: 10–12. ISSN 1328-2727.
- Hart, Peter (2013a). "The Day It All Went Wrong: The Naval Assault Before the Gallipoli Landings". Wartime (62). Canberra: Australian War Memorial: 8–13. ISSN 1328-2727.
- Hughes, Matthew (2005). "The French Army at Gallipoli". The RUSI Journal. 153 (3): 64–67. doi:10.1080/03071840508522907. ISSN 0307-1847. S2CID 154727404.
- Sheffy, Yigal (2005). "The Chemical Dimension of the Gallipoli Campaign: Introducing Chemical Warfare to the Middle East". War in History. 12 (3). Sage Publications: 278–317. doi:10.1191/0968344505wh317oa. ISSN 1477-0385. S2CID 154534581.
- Stevenson, Robert (2007). "The Forgotten First: The 1st Australian Division in the Great War and its Legacy" (PDF). Australian Army Journal. IV (1): 185–99. OCLC 30798241. Archived from the original (PDF) on 12 March 2017. Retrieved 1 July 2017.
Newspapers edit
- "Reason for Gallipoli". The Tamworth Daily Observer. Vol. V, no. 253. New South Wales, Australia. 21 October 1915. p. 2. Retrieved 25 April 2018 – via National Library of Australia.
Websites edit
- "ANZAC Day 2010 – The Gallipoli Campaign" (PDF). Australian Department of Veterans' Affairs. Archived from the original (PDF) on 13 March 2013. Retrieved 8 April 2010.
- "Anzac Day Today". rsa.org.nz. 4 January 2011. Archived from the original on 4 February 2012.
- "AWM 4-10-2-47 2nd Light Horse Brigade War Diary November 1918 Appendix 3" (pdf). Headquarters 2nd Light Horse Brigade. Archived from the original on 22 December 2018. Retrieved 27 April 2013.
- "Cape Helles Memorial to the Missing". Commonwealth War Graves Commission. Archived from the original on 12 July 2007. Retrieved 3 December 2006.
- "Enumerating New Zealand Expeditionary Force Service on Gallipoli" (PDF). Manatū Taonga, the Ministry for Culture and Heritage. Ministry for Culture and Heritage (MCH) and the New Zealand Defence Force (NZDF). 2016. Archived (PDF) from the original on 11 June 2016. Retrieved 21 March 2016.
- "Gallipoli Casualties by Country". NZ History. New Zealand Ministry for Culture and Heritage. 1 March 2016. Archived from the original on 2 February 2017. Retrieved 15 January 2017.
- "ebook Phenomenal and Wicked: Attrition and Reinforcements in the New Zealand Expeditionary Force at Gallipoli". New Zealand Defence Force. 2020. Archived from the original on 8 August 2020. Retrieved 19 August 2020.
- Green, David (28 August 2013). "How Many New Zealanders Served on Gallipoli?". Archived from the original on 26 November 2015. Retrieved 26 November 2015.
- Hammer, Joshua. "A New View of the Battle of Gallipoli, One of the Bloodiest Conflicts of World War I". Smithsonian. Archived from the original on 23 October 2017. Retrieved 23 October 2017.
- Keane, Daniel (22 April 2015). "Eric Bogle: Australia's anti-war balladeer reflects on his Anzac anthem and his upcoming trip to Gallipoli". ABC News. Australian Broadcasting Corporation. Archived from the original on 11 October 2016. Retrieved 11 October 2016.
- Kirbaki, Yorgo (24 April 2015). "Ottoman military graveyard found on Greek island off Gallipoli". Hurriyet Daily News. Archived from the original on 7 November 2017. Retrieved 7 November 2017.
- "Kurtuluş Savaşı Komutanları". canakkalesehitlik.net. 5 May 2015. Archived from the original on 18 March 2017. Retrieved 18 March 2017.
- "Lead Contamination Closes Corner Brook Armoury". CBC News. 12 January 2012. Archived from the original on 18 January 2017. Retrieved 18 January 2017.
- "Nazi Shell in Egypt Wounds One of British Empire's Most Fabulous Soldiers". Life. 17 August 1942. p. 28. Archived from the original on 7 February 2023. Retrieved 19 November 2011.
- "Portianos Military Cemetery". Commonwealth War Graves Commission. Archived from the original on 20 May 2013. Retrieved 28 April 2013.
- Taskiran, Cemalettin (18 March 2005). "Entente Attacks on Turkish Patients & Wounded". The Journal of the Turkish Weekly. Archived from the original on 15 May 2015. Retrieved 2 December 2006.
- "West Mudros Moslem Cemetery". Commonwealth War Graves Commission. Archived from the original on 22 February 2014. Retrieved 28 April 2013.
- Wilson, Ross. "Street Names: The Local, National and International Memory of the First World War". World War I Centenary: Continuations and Beginnings. University of Oxford. Archived from the original on 18 January 2017. Retrieved 18 January 2017.
Further reading edit
Books edit
- Baly, Lindsay (2003). Horseman, Pass By: The Australian Light Horse in World War I. East Roseville, NSW: Simon & Schuster. OCLC 223425266.
- Basarin, Vecihi; Basarin, Hatice Hurmuz (2008). Beneath the Dardanelles: The Australian Submarine at Gallipoli. Crows Nest, NSW: Allen & Unwin. ISBN 978-1-74175-595-4. Archived from the original on 20 January 2022. Retrieved 9 October 2015.
- Cassar, George H. (2019). Reluctant Partner: The Complete Story of the French Participation in the Dardanelles Expedition of 1915. Warwick: Helion. ISBN 978-1-911628-92-7.
- Erickson, Edward J. (2007). Gooch, John; Reid, Brian Holden (eds.). Ottoman Army Effectiveness in World War I: A Comparative Study. Military History and Policy. Abingdon, Oxon: Routledge. ISBN 978-0-203-96456-9.
- Foster, Henry Clapham (1918). At Antwerp and the Dardanelles. London: Mills and Boon.
- Gilbert, Martin (2004). The First World War: A Complete History. New York: Henry Holt and Co. ISBN 978-0-8050-7617-2.
- Hart, Peter (2011). Gallipoli. London: Profile Books. ISBN 978-1-84668-159-2.
- Hart, Peter (2020). The Gallipoli Evacuation. Sydney: Living History. ISBN 978-0-6489-2260-5. Archived from the original on 14 May 2021. Retrieved 24 October 2020.
- Kraaijestein, Martin; Schulten, Paul (2009). Het Epos van Gallipoli. Feiten, verhalen en mythen over de geallieerde aanval op Turkije tijdens de Eerste Wereldoorlog [The Epic of Gallipoli. Facts, Stories and Myths about the Entente Attack on Turkey during World War I] (in Dutch). Soesterberg: Uitgeverij Aspekt. ISBN 978-90-5911-758-7.
- Kyle, Roy (2003). An Anzac's Story. Camberwell: Penguin. ISBN 978-0-14-300187-4.
- Laffin, John (1980). Damn the Dardanelles!: The Story of Gallipoli. London: Osprey. ISBN 0-85045-350-X. OCLC 7770209.
- Lambert, Nicholas A. (2021). The War Lords and the Gallipoli Disaster. Oxford: Oxford University Press. ISBN 978-0-19-754520-1.
- Orr, Philip (2006). Field of Bones: An Irish Division at Gallipoli. Dublin, Ireland: Lilliput Press. ISBN 978-1-84351-065-9.
- Özdemir, H. (2008) [2005]. The Ottoman Army: Disease and Death on the Battlefield 1914–1918. Salt Lake City: University of Utah Press. ISBN 978-1-60781-964-6.
- Patton, George S. (1936). The Defense of Gallipoli: A General Staff Study. Hawaii: Hawaiian Department.
- Plowman, Peter (2013). Voyage to Gallipoli. Kenthurst, NSW: Rosenberg. ISBN 978-1-922013-53-8.
- Rudenno, Victor (2008). Gallipoli: Attack from the Sea. New Haven: Yale University Press. ISBN 978-0300124408.
- Tyquin, Michael (1993). Gallipoli: The Medical War. Sydney: University of New South Wales Press. ISBN 978-0-86840-189-8.
- Uyar, Mesut (2015). The Ottoman Defence Against The Anzac Landing. Australian Army Campaigns. Vol. 16. Newport, NSW: Big Sky. ISBN 978-1-925275-01-8.
- Waite, Fred (1919). The New Zealanders at Gallipoli. Official History New Zealand's Effort in the Great War. Vol. I. Auckland, NZ: Whitcombe and Tombs. OCLC 8003944. Archived from the original on 27 January 2023. Retrieved 3 February 2023.
Newspapers edit
- "Blamey Boys". Daily Advertiser. New South Wales, Australia. 9 November 1939. p. 3. Archived from the original on 7 February 2023. Retrieved 28 April 2018 – via National Library of Australia.
- "Death of Composer". The News. Vol. 38, no. 5, 811. Adelaide. 12 March 1942. p. 3. Archived from the original on 7 February 2023. Retrieved 29 April 2018 – via National Library of Australia.
- ""Jack Spade" Wrote Hit And Vanished". The Sunday Herald (Sydney). No. 1. New South Wales, Australia. 23 January 1949. p. 3. Archived from the original on 7 February 2023. Retrieved 28 April 2018 – via National Library of Australia.
Websites edit
- Carlyon, Les (11 November 2004). "Australian War Memorial Anniversary Oration: Gallipoli in a Nation's Remembrance". soundtrack and text. Australian War Memorial. Archived from the original on 8 December 2004. Retrieved 7 December 2008.
External links edit
- Winston Churchill & Gallipoli – UK Parliament Living Heritage
- "Learning resources from the Imperial War Museum". Archived from the original on 1 September 2020. Retrieved 19 May 2016.
- "Map of Europe during the Gallipoli Campaign". Omniatlas.com. Archived from the original on 19 April 2014. Retrieved 14 February 2012.
- "Despatches". The campaign at the Dardanelles (Gallipoli). The Long Long Trail.
- "Gallipoli Centenary Research Project". Macquarie University. Archived from the original on 8 June 2013.
- "Winston Churchill's World War Disaster". 3 September 2018.
- "Gallipoli casualties by country". NZ History.
 Gallipoli Diary public domain audiobook at LibriVox
- "Australia's role in the Gallipoli Campaign". ABC and Department of Veteran's Affairs.